Proxies and accounts: where to get them and how to get them ready
Airgram works with your Telegram accounts and your proxies. How you choose and prepare them matters more than any module settings.
Good proxies and prepared accounts last a long time and get through tasks smoothly. Bad ones end up restricted on the very first run, and no pause settings will fix that. So start with preparation, not with the modules.
- which proxies work and where sellers cut corners;
- how to add, check and bind proxies in Airgram;
- how to add accounts and prepare them for the workload.
Which proxies work
Telegram sees the address an account connects from. If dozens of accounts come from one IP or from a data center, it looks like a farm, and restrictions soon follow. When choosing proxies, look at four things:
- Type. Get private mobile or residential proxies. Telegram detects data center addresses more readily.
- Country. The closer the proxy's country is to the country of the account's number, the more natural the connection looks.
- How many. One proxy for each working account.
- Stability. It matters more than speed: a dropped connection in the middle of a task costs more than a slow response.
There are almost no protocol limitations: Airgram works with SOCKS5, SOCKS4, HTTP and HTTPS. But check your provider's limits on traffic and the number of simultaneous connections in advance.
How to add proxies
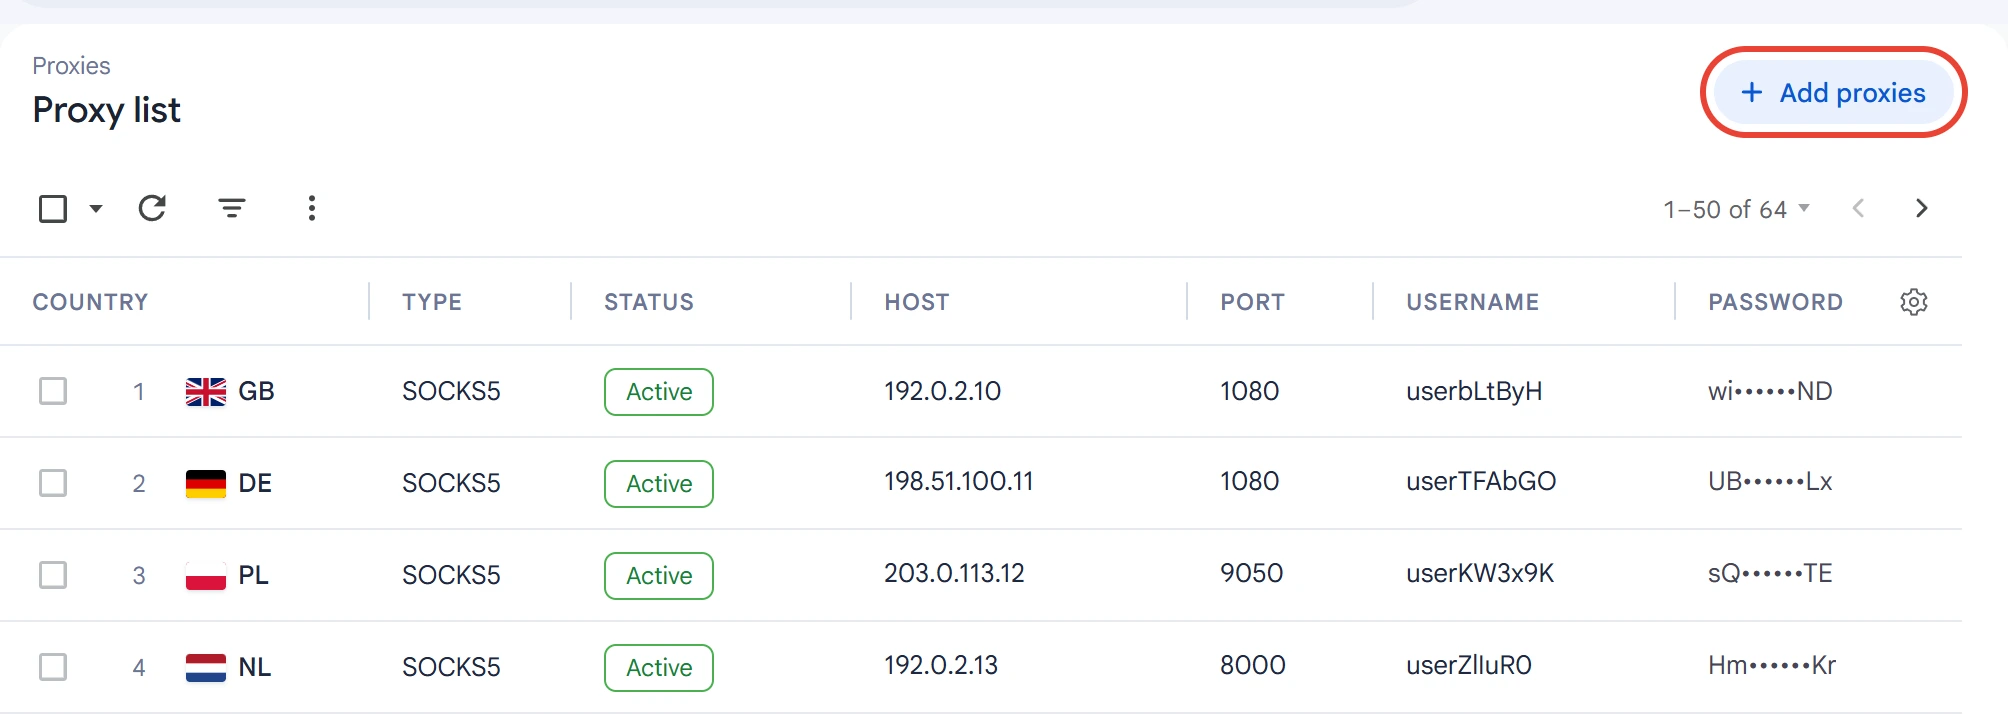
Open the “Proxies” section and click “Add proxies” in the top right corner.
Paste the list, one proxy per line, in the format your provider gave you. If the list is in a file, click “Load from file” and choose a .txt or .csv file. Above the field you can see how many proxies you've added.
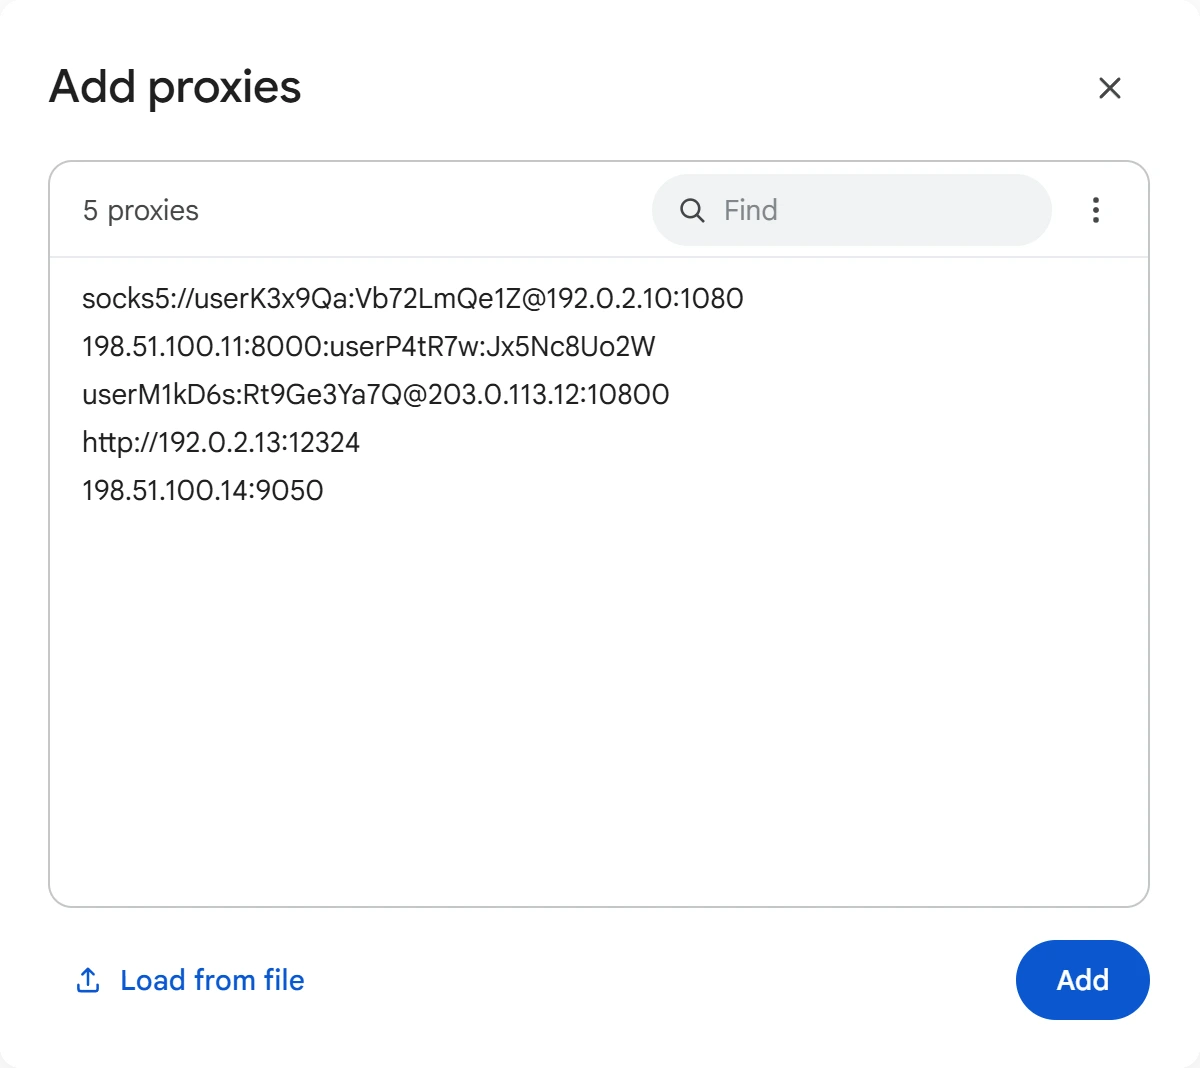
The program understands these formats:
socks5://login:password@host:port
host:port:login:password
login:password@host:port
host:port@login:password
host:port
If no protocol is specified, Airgram uses SOCKS5. So for HTTP and HTTPS proxies, specify the protocol explicitly, for example http://host:port. The program skips duplicates and invalid lines on its own and shows how many records couldn't be processed.
Proxy check
A check starts right after you add proxies. To repeat it for the whole list, use the “⋮” menu above the table → “Check all”. For specific proxies, select their rows and click the check icon.
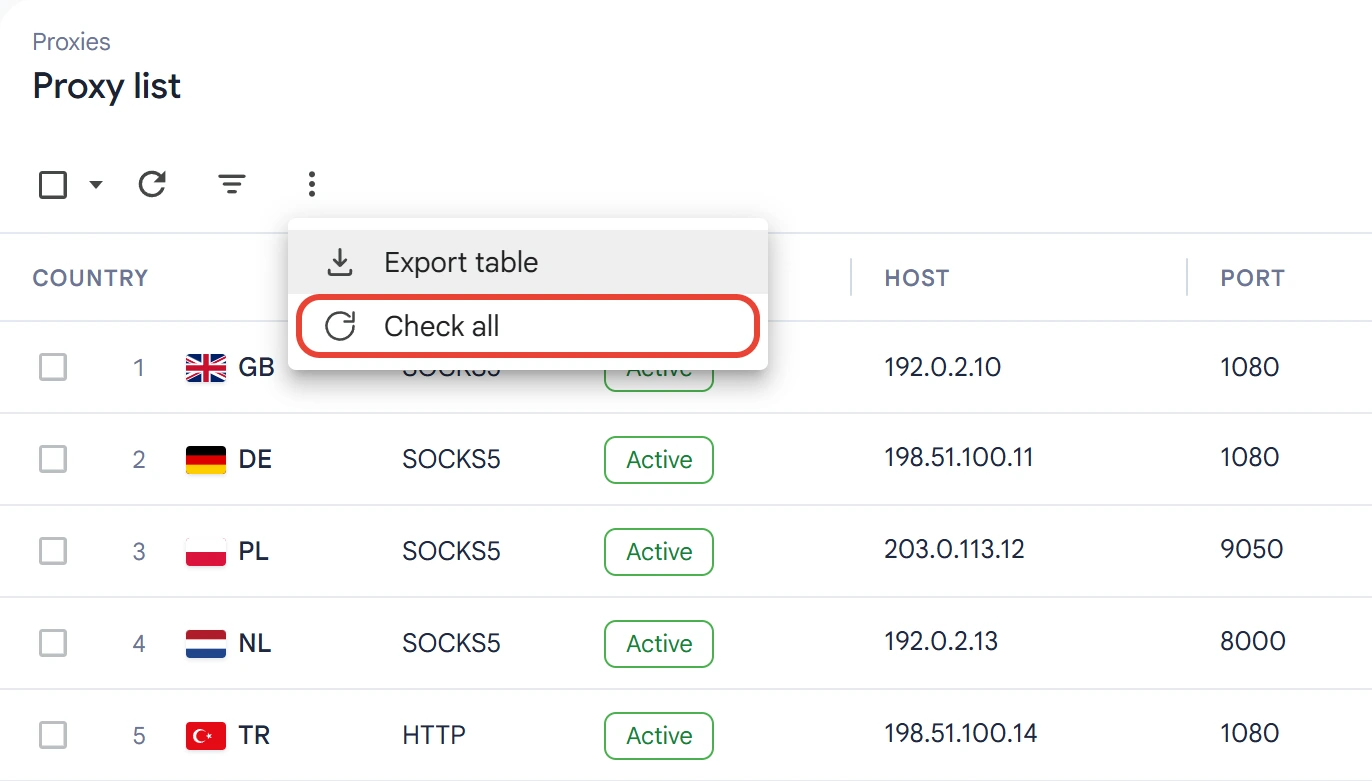
For each proxy, you'll see the connection status, latency, the country from the IP address and the error reason if the connection failed. Compare the country: if the provider promised one and the check shows another, ask them about it before the run, not after.
How to add accounts
In the “Accounts” section, click “Add accounts” and choose a method:
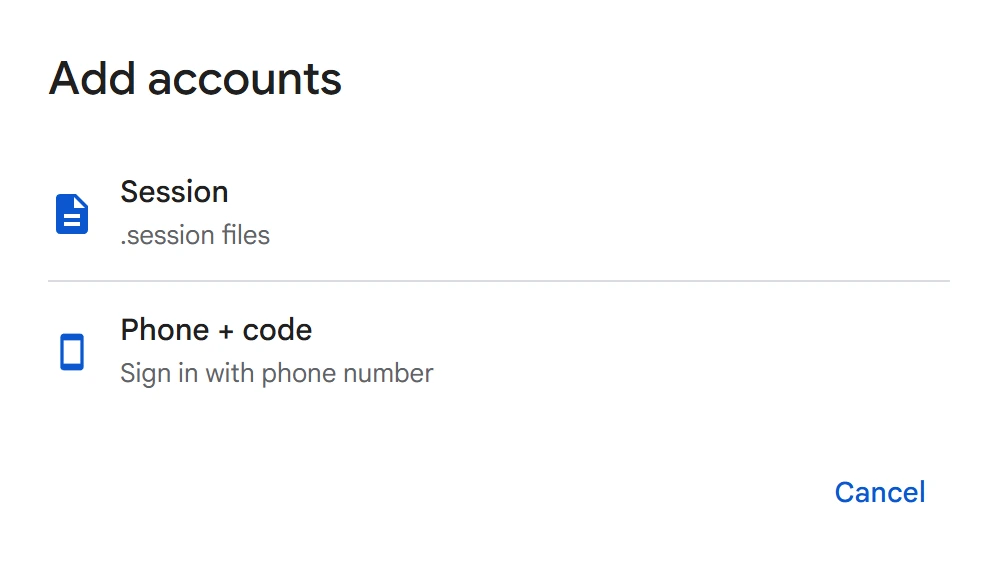
- Session —
.sessionfiles together with.json. Drag them into the window or put them in thesessionsfolder. - Phone + code — log in with a phone number. The program requests a confirmation code, just like a regular Telegram login.
When buying accounts, keep two things in mind. Telegram's limits are per account, so high volume comes from numbers, not load: many accounts, each doing a little. And get more accounts than you need: in mass tasks, some always end up restricted.
Binding proxies to accounts
Select accounts in the table and open “⋮” → “Proxies”.
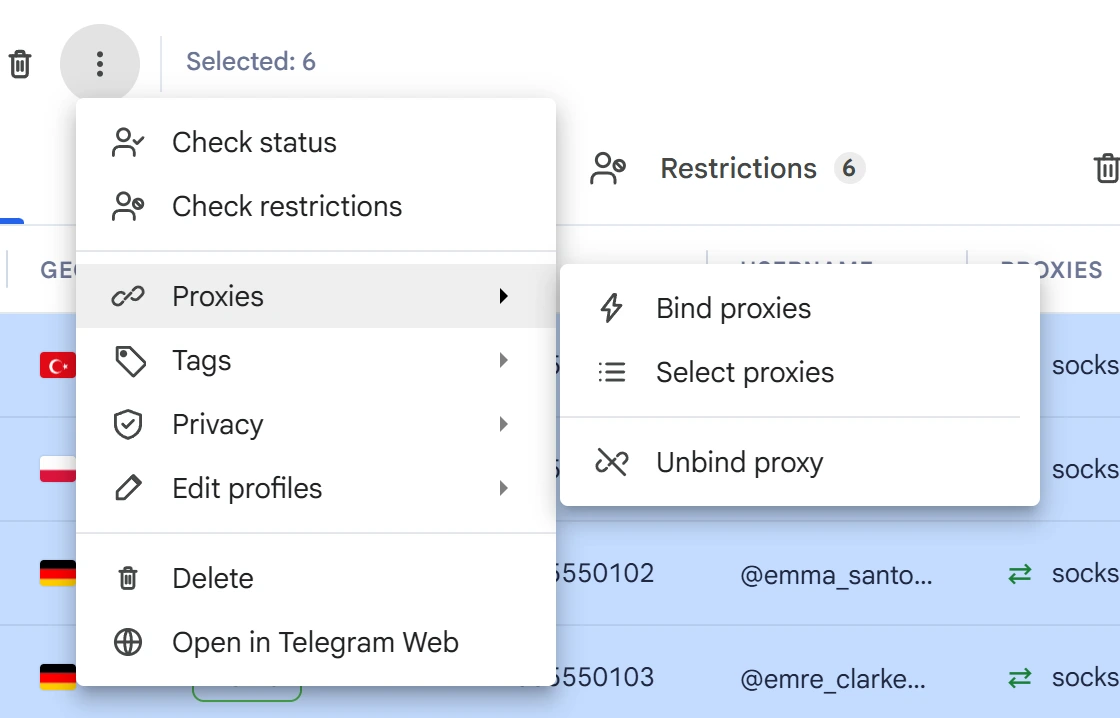
- Bind proxies — the program distributes free proxies across the selected accounts on its own. This is the fastest option.
- Select proxies — assign a specific proxy manually.
- Unbind proxy — remove the proxy binding, for example before replacing the list.
Checking an account requires an assigned proxy, so bind proxies before the first check.
Preparing accounts
To Telegram, a fresh account with an empty profile that starts inviting strangers on its first day looks suspicious. Let it start looking like a regular user:
- Fill in the profile — photo, name, bio. To do this in bulk, use the “⋮” menu → “Edit profiles” or the “Profile Filler” module.
- Add a few subscriptions to channels and groups. The “Join / Leave” module is there for this.
- Give the account a couple of days with no workload, and only then put it in tasks.
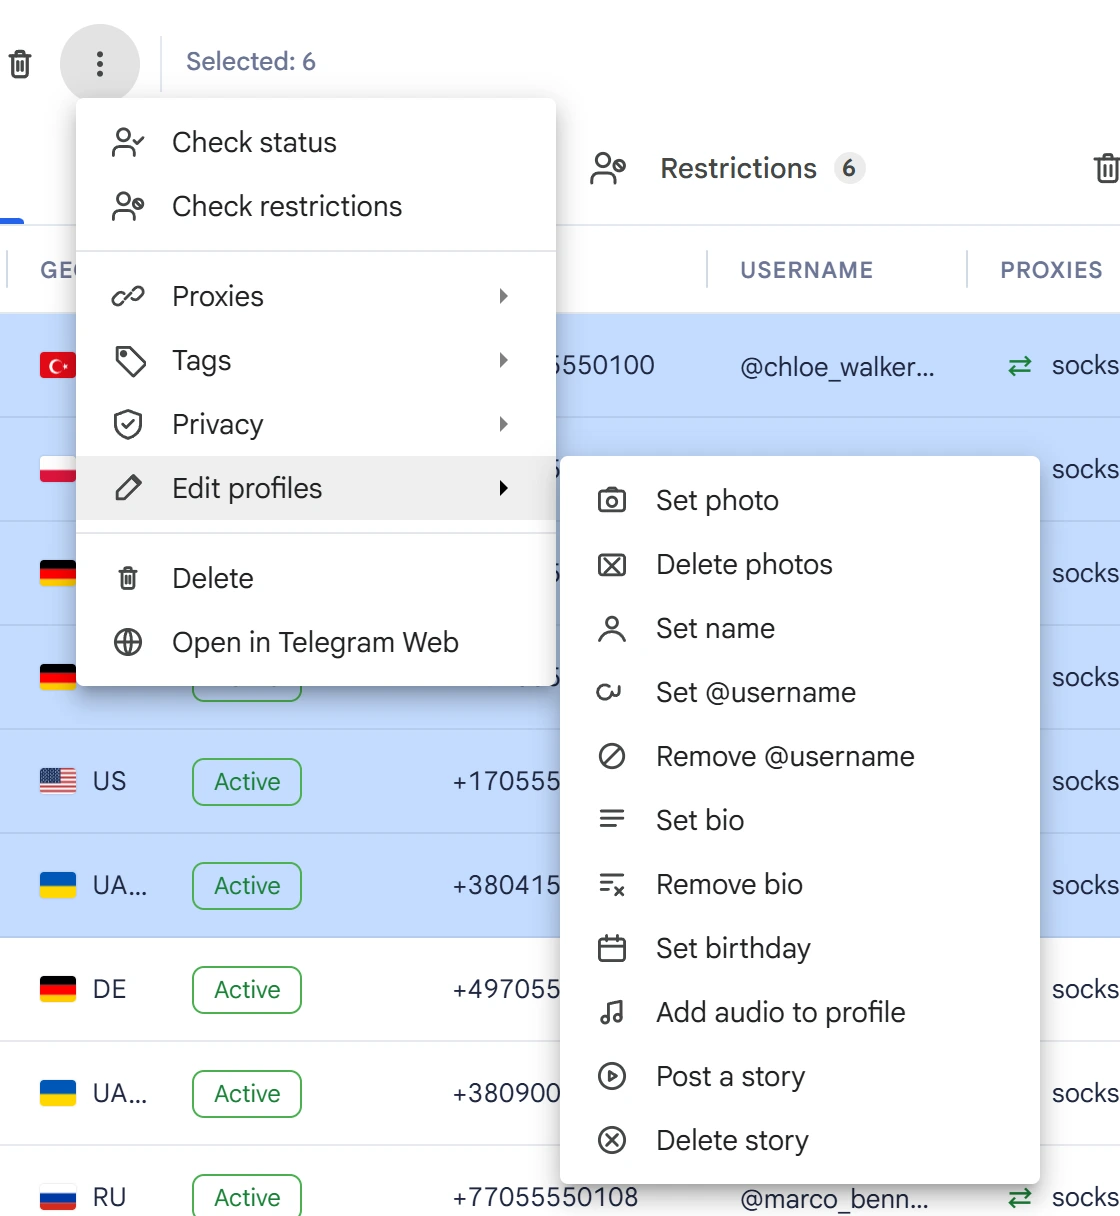
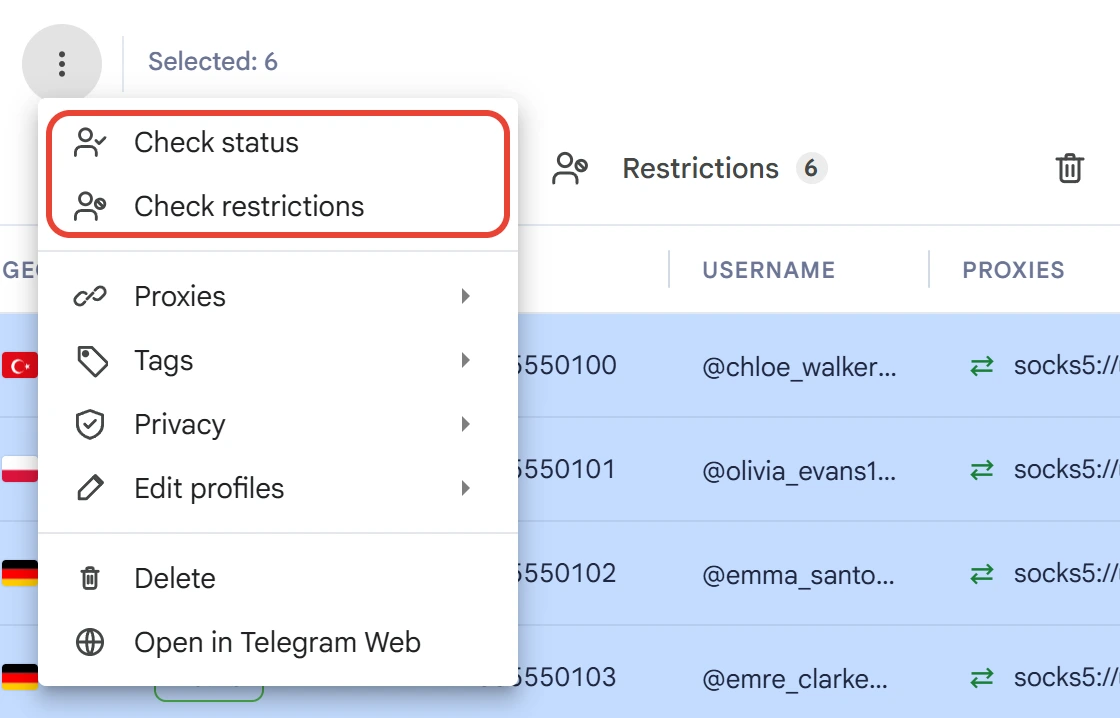
Before starting, check your accounts: “⋮” → “Check status”. For invites and broadcasts, also click “Check restrictions”: the program asks @SpamBot and shows whether the account has a spam block.
Checklist before your first run
- Each working account has its own proxy.
- The proxies passed the check, and you're happy with the country and latency.
- Profiles are filled in, and accounts have rested for a couple of days.
- Accounts are checked, and only active ones go to work.
- You have spare accounts in case of restrictions.
Preparation takes a couple of days, but it pays off: accounts stay in work longer, and tasks don't break off halfway. If restrictions do appear, see the Spam block and FloodWait article.