
General
Accounts
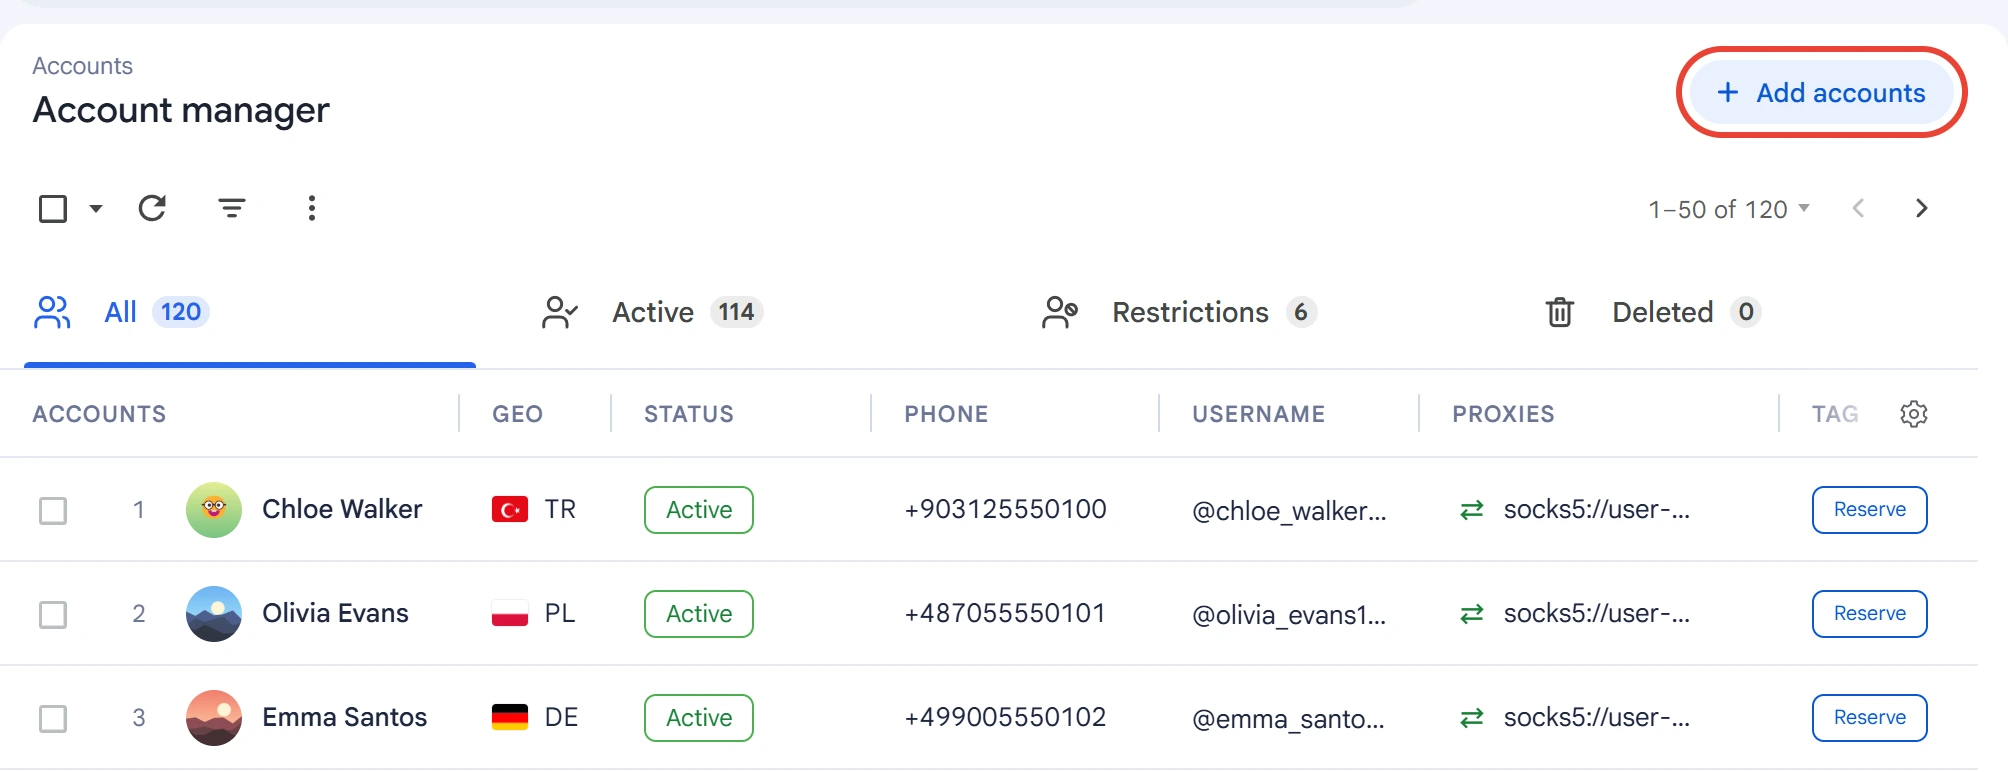
The “Accounts” section stores the Telegram accounts you've added. Here you can check their status, manage tags and proxies, change settings and perform other actions.
Adding accounts#
Open the “Accounts” section and click “Add accounts” in the top right corner.
In the window that opens, choose how to add accounts:
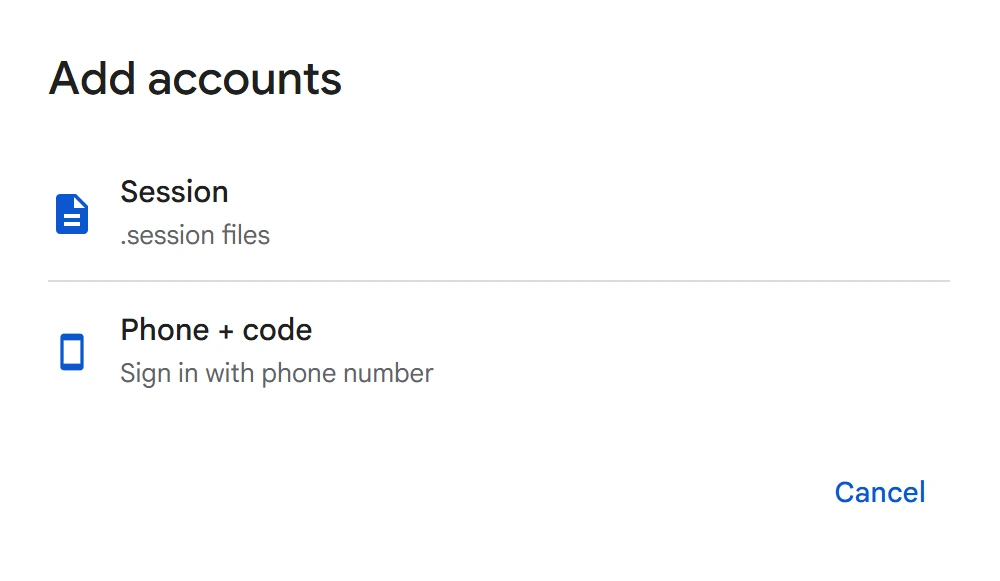
- Session — import accounts from
.sessionfiles and their linked.jsonfiles. Drag the files into the window or put them in thesessionsfolder. - Phone + code — log in with a phone number. The app requests a confirmation code, just like a regular Telegram login.
For more on account formats, see Sessions and tdata.
Checking accounts#
After adding accounts, check their status to find out whether they're suitable for further work. Select the accounts you need, click “⋮” above the table and choose “Check status”.
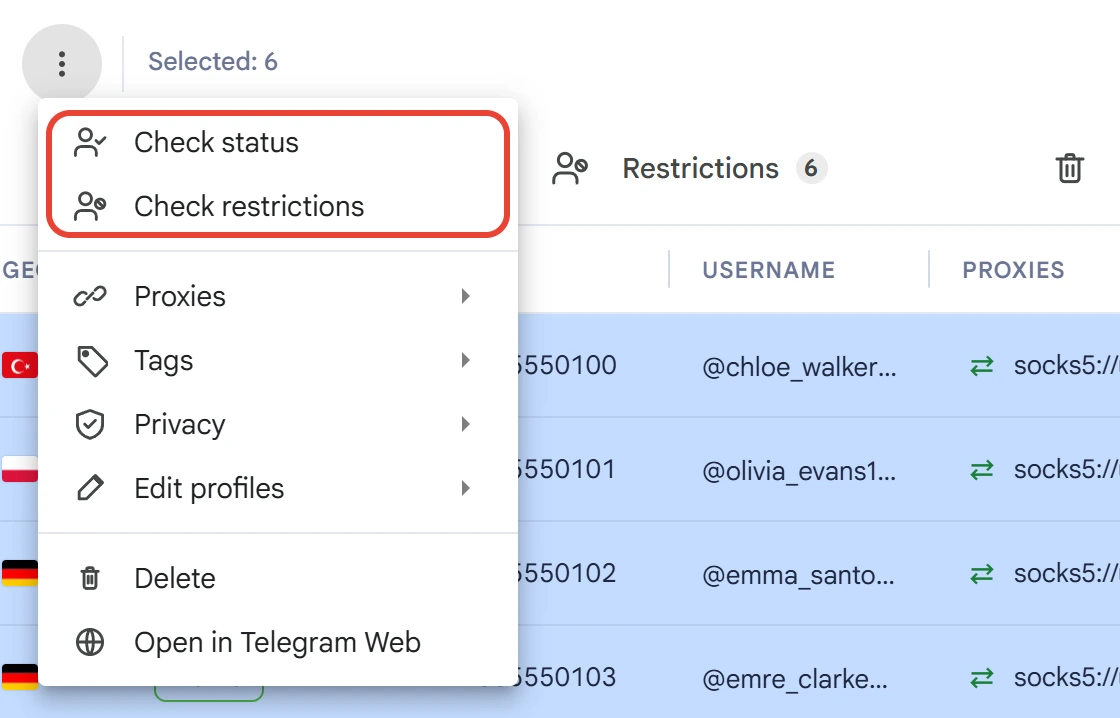
The check updates the account's status, name and username. The “Check restrictions” action also contacts @SpamBot to find out whether there's a spam block. This information matters when you prepare accounts for inviting and broadcasts.
Main statuses:
- Active — the account is available for work.
- Temporary spam block — a temporary restriction applies to the account. Once it's lifted, the account can return to the active category.
- Permanent spam block — the restriction isn't lifted automatically. For more information, see Remove Restrictions.
- Frozen or Banned — the account is restricted and can't be used for regular work tasks.
Account actions#
To manage accounts, use the “⋮” menu above the table. Available actions include managing proxies and tags, configuring privacy, editing profiles, deleting accounts and opening them in Telegram Web.
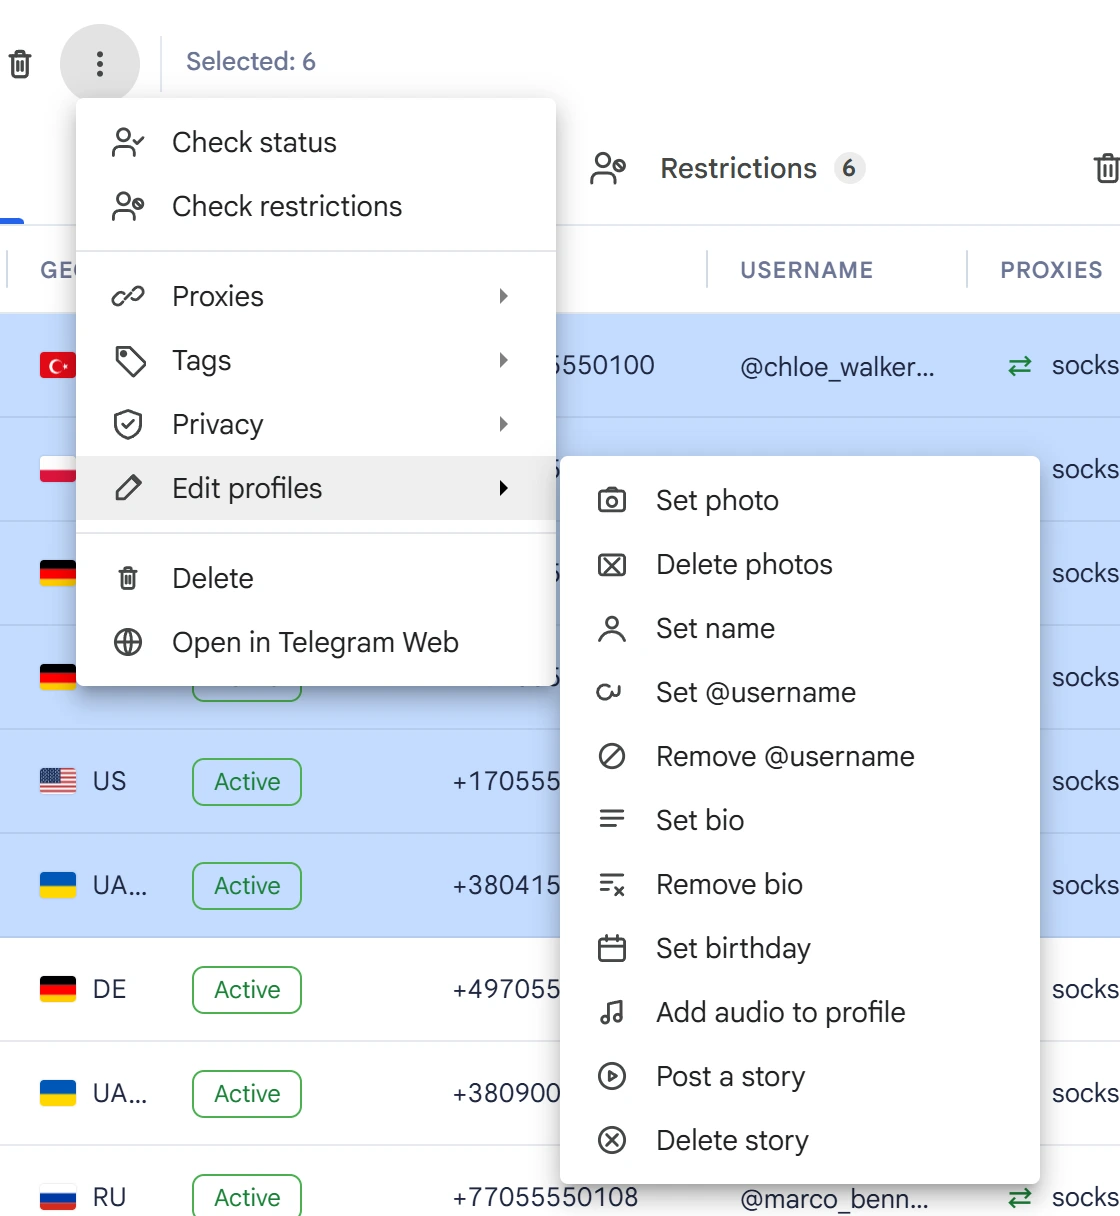
Actions apply to all selected accounts. Before running a bulk operation, make sure the right records are selected.
Deleted accounts move to the “Deleted” tab, where you can restore them.