
General
Lists
The “Lists” section stores the lists your modules work with: users for invites and broadcasts, groups and channels, and phone numbers.
The section has three tabs:
- Users — people: who to invite to a group and who to send direct messages to.
- Sources — groups and channels: where to collect people from, where to broadcast and what to join.
- Numbers — phone numbers and their check results from the Number Checker.
Adding a list#
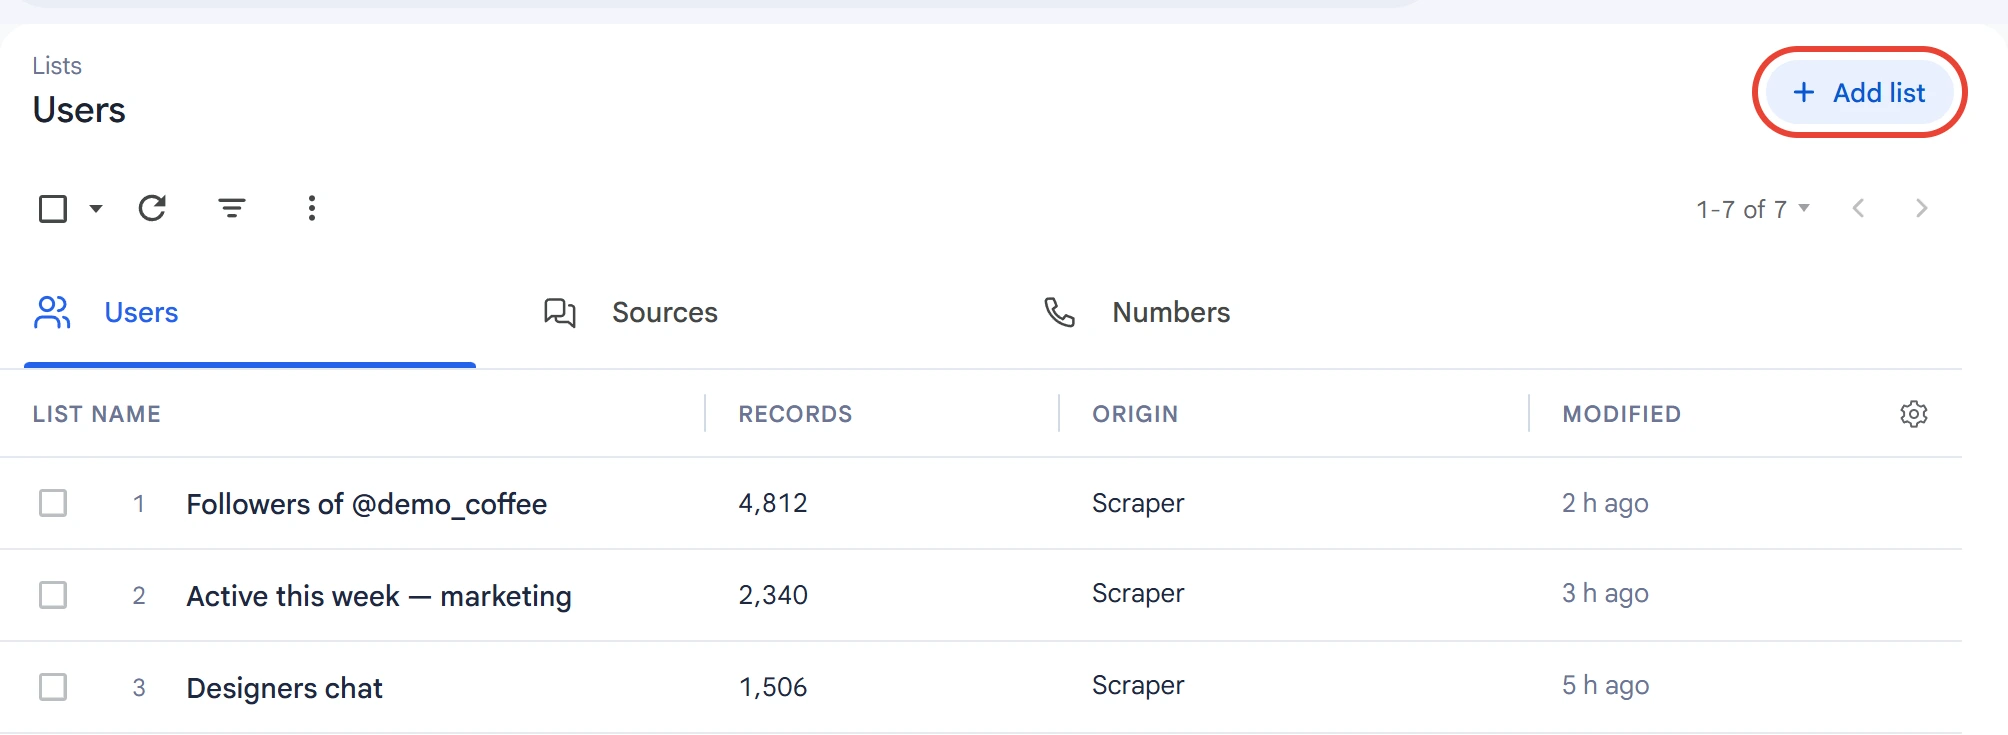
Open the “Lists” section, go to the “Users” tab and click “Add list” in the top right corner.
Enter the list name in the top line of the window. If you leave it empty, the list gets a name with the date — you can rename it later in the header of the open list.
Below that, paste the list of users, one per line: @username or a t.me/… link. To add a list from a file, click “Load from file” or drag a .txt, .csv or .db file onto the field. The top of the window shows how many users were recognized and how many lines weren't parsed. When the list is ready, click “Create list”.
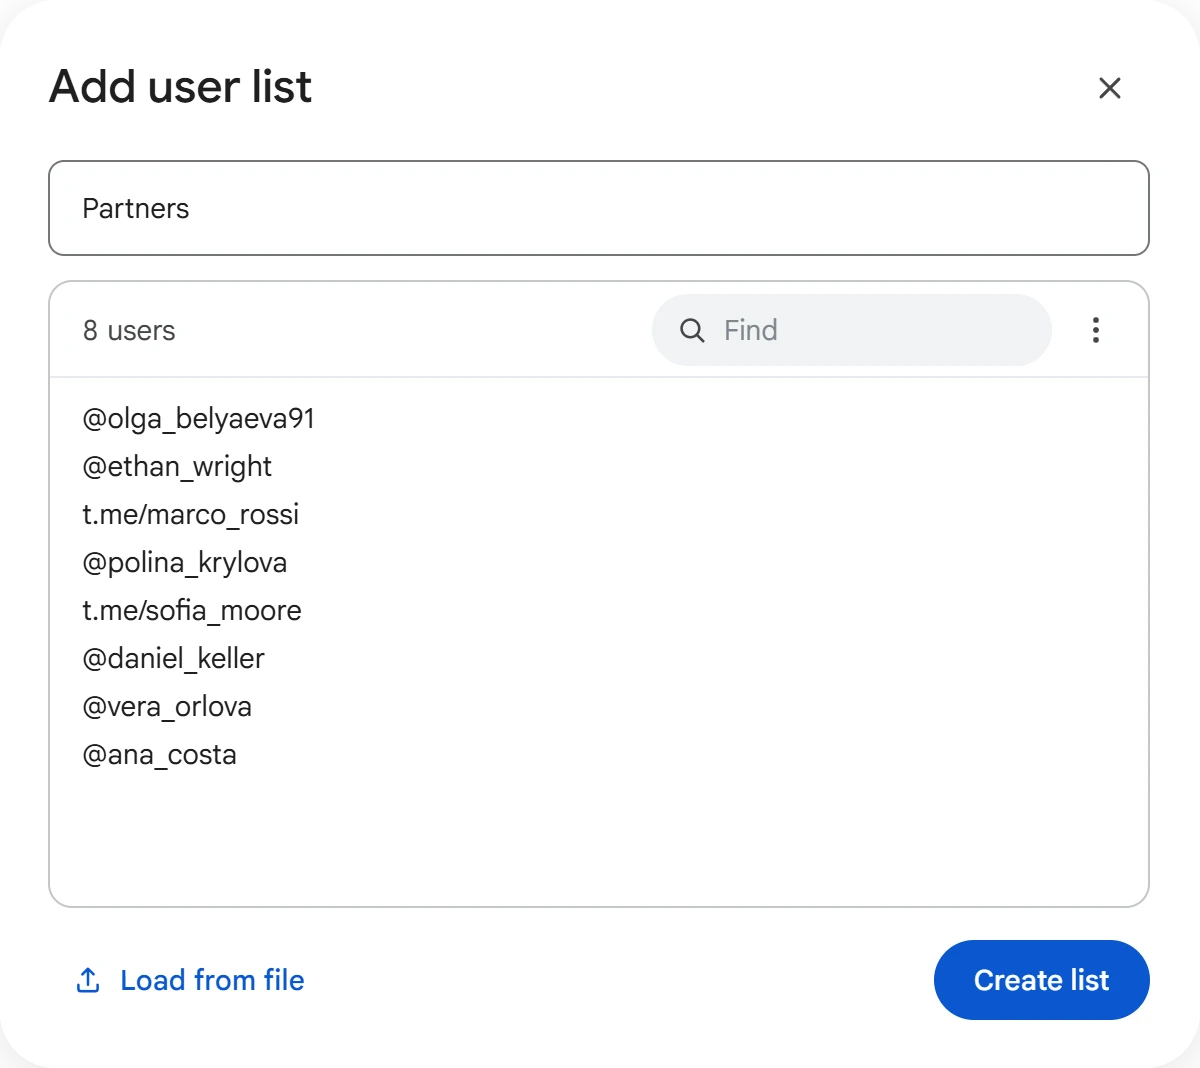
Duplicates aren't added: a record that's already in the list won't get in a second time. For more on formats, see Text variants and list formats.
Where else lists come from#
The “Origin” column shows where a list came from:
- Scraper — the people were collected by the Audience Scraper.
- Checker — the Number Checker saved the people it found in Telegram. The check results for all numbers are on the “Numbers” tab.
- Import — the list was loaded from a list file.
- Manual — the list was created with the “Add list” button.
- Copy — the list was duplicated from another one.
Lists on the “Sources” tab are filled by Group & Channel Search; you can also create them there by hand with the “Add list” button.
Working with a list#
To open a list, click its name. The table shows each record, its type, name, username, status and when the person was last online.
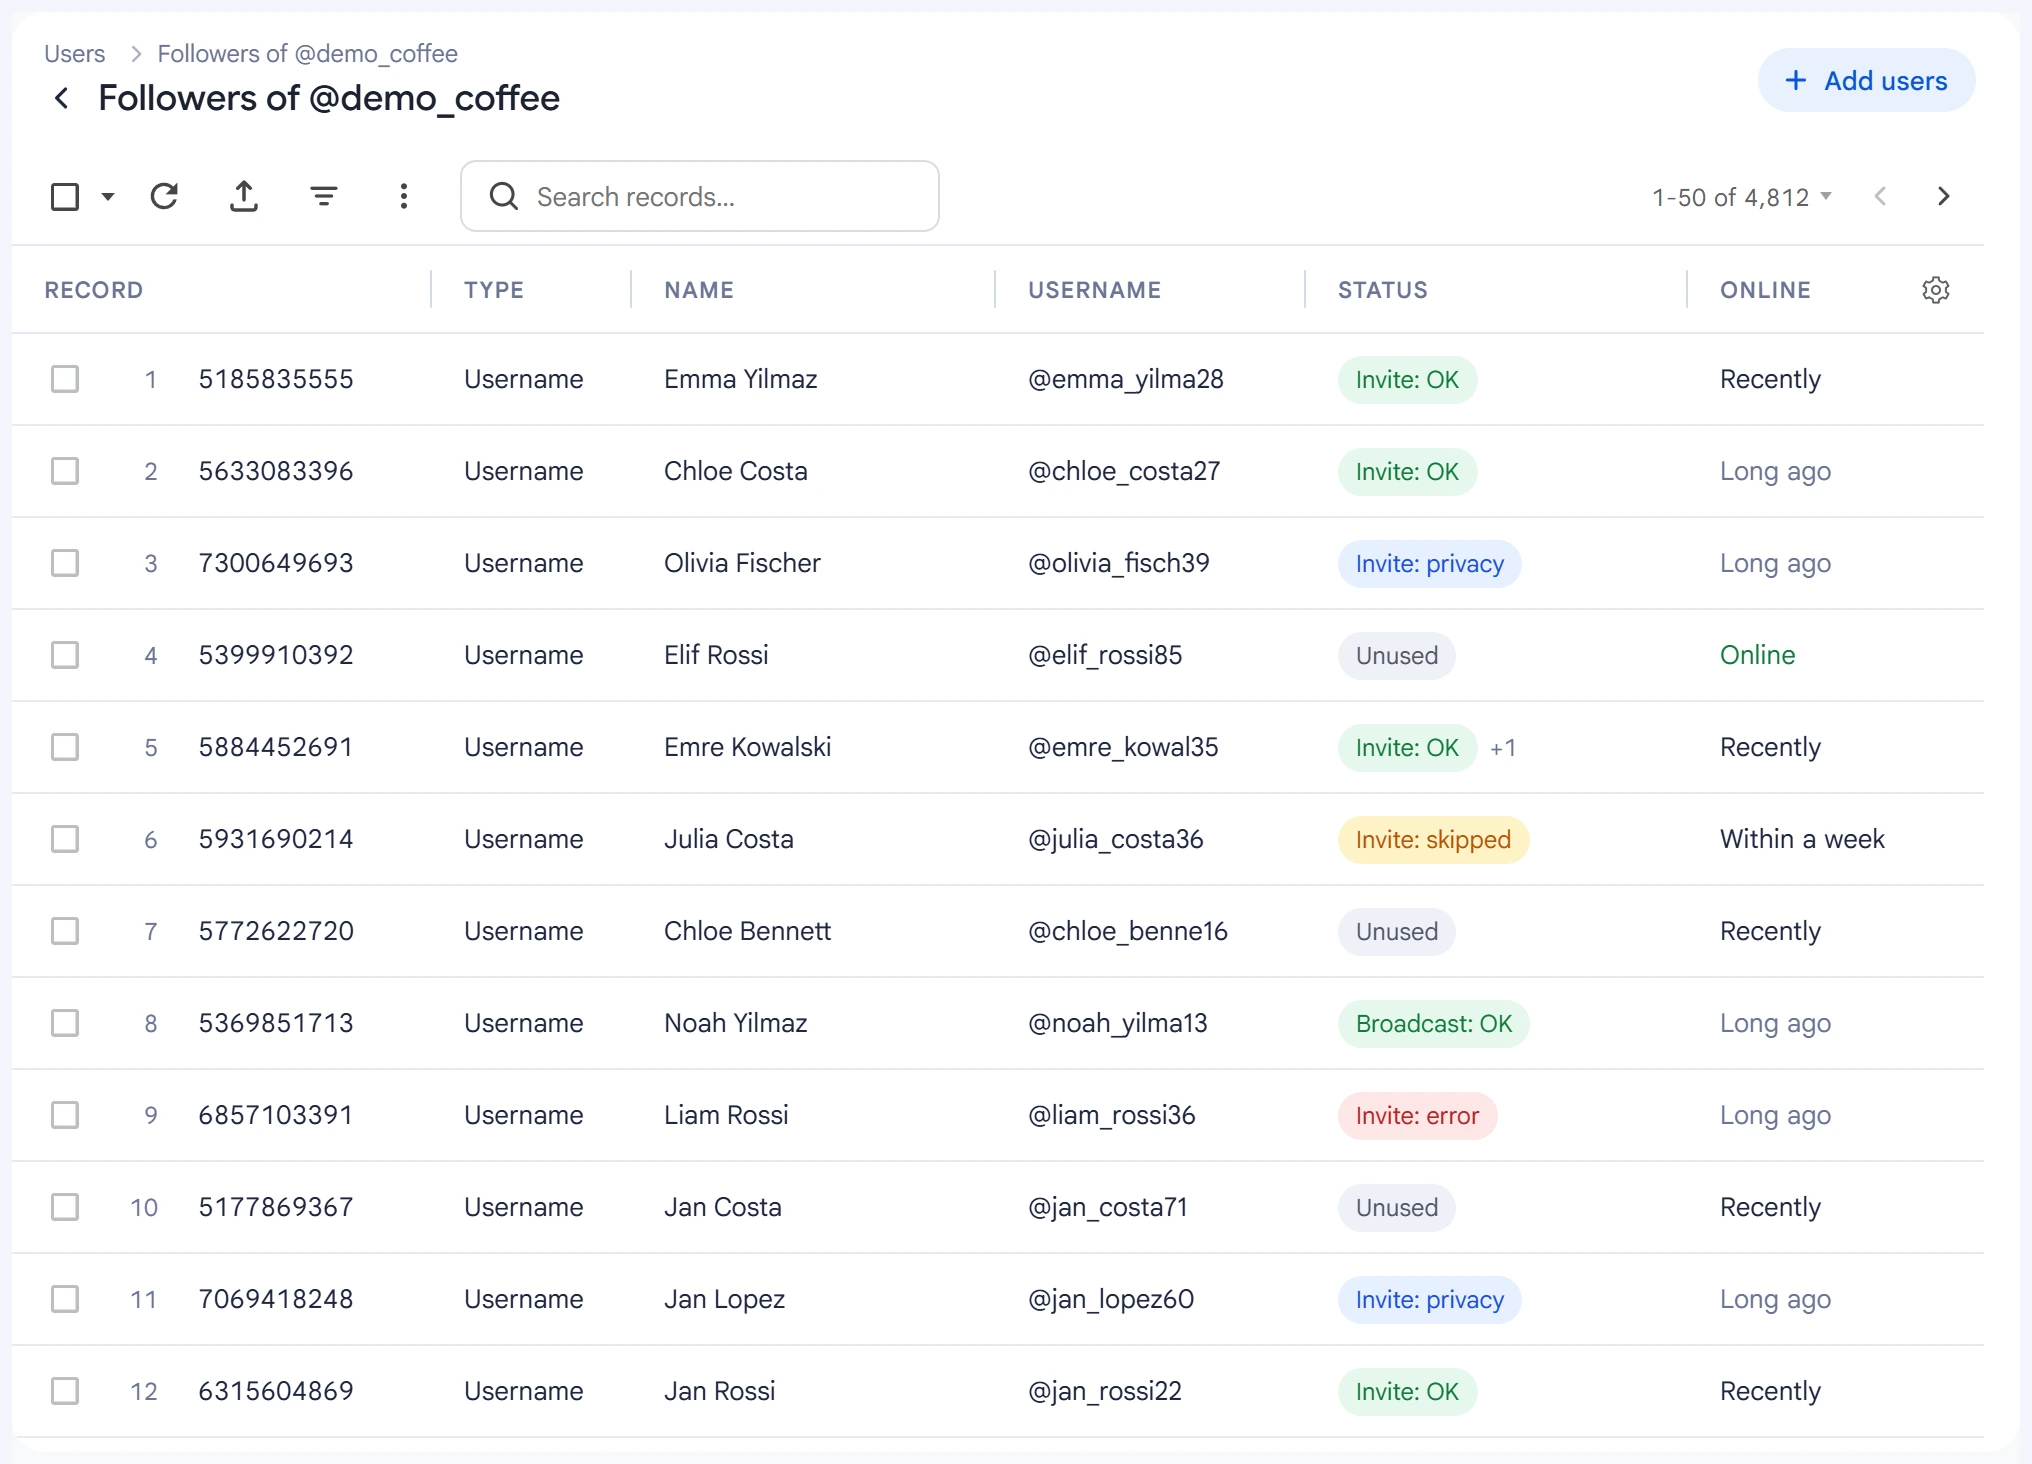
- Add users — add new records to the open list. The window is the same as when you create a list, only without the name line.
- Search records — find a person by name, username or ID.
- Filters — show records of a given type, module and state, for example people Invite hasn't touched yet.
- The “⋮” menu — export the table, remove all statuses, duplicate the list and delete it.
Record statuses#
The “Status” column shows what has already been done with a record, in the form “Module: state”: “Invite: OK”, “Broadcast: OK” and so on. An untouched record is marked “Unused”.
States:
- OK — success.
- privacy — the person blocked invites or messages in their privacy settings.
- skipped — the record was skipped, for example because the person is already in the group.
- error — the action failed.
- excluded — the record was excluded from tasks by hand (“Manual: excluded”).
Each module keeps its own marks: a person who was invited is still free for a broadcast. Invite doesn't take people marked “Invite: privacy”, because the refusal would repeat, and a broadcast doesn't message people marked “Broadcast: OK”.
Excluding from tasks#
To keep every module away from certain people — for example, your own staff or people who asked not to be contacted — select them in the list and click “Exclude from tasks” on the panel. The records get the “Manual: excluded” status, and neither Invite nor a broadcast will take them.
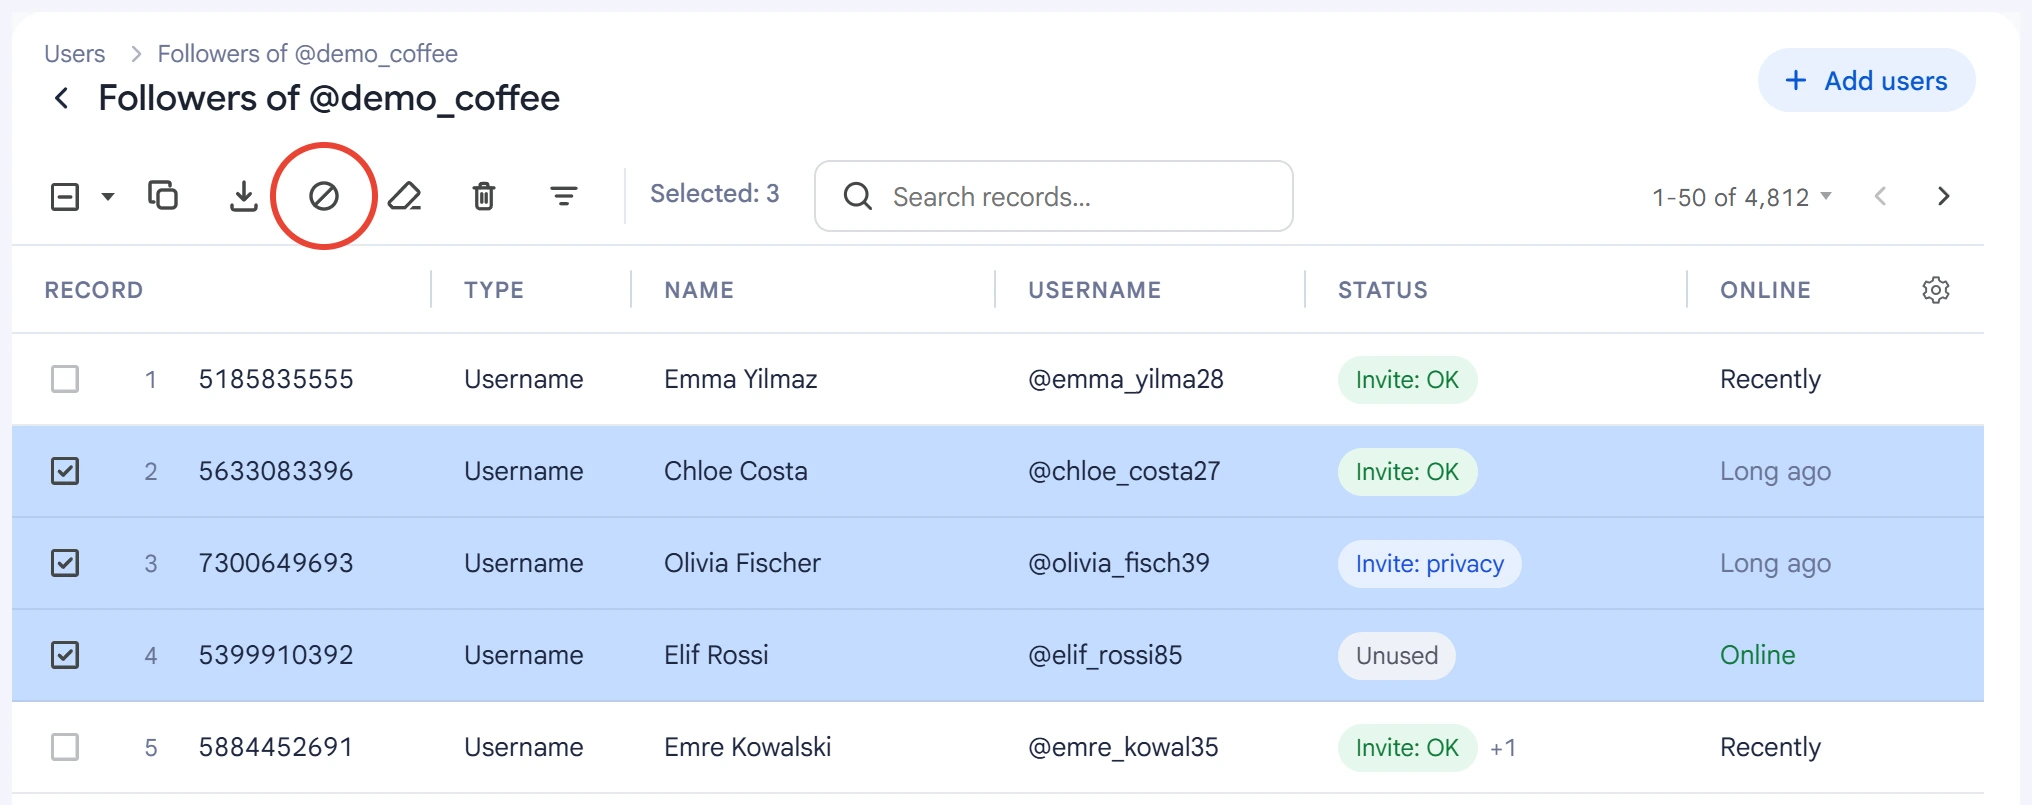
Right after excluding, you can undo it with the “Cancel” button in the notification. Later, you can bring records back with the “Clear statuses on selected” button: it removes all marks from the selected records, not just the exclusion.
List actions#
Select lists in the table, and the actions appear on the panel:
- Duplicate — make a copy of a list.
- Merge into a new list — combine the selected lists into one, without duplicates.
- Export to .txt — save the records to a file.
- Delete — delete the selected lists.
Tips#
- Keep a separate list for each project.
- A module uses a list by reference: top it up with the scraper, and the next run will see the new records.
- Before you start, filter the list by the “Unused” state so you don't process people twice.