Telegram invites: how to bring your audience into a group
Inviting is the fastest way to fill a group with a real audience, and the riskiest for your accounts. Let's see how to set up a task so you get results without losing accounts.
Airgram has two modules for inviting. They do the same job, adding people to your group, but they work differently. First we'll look at which one to choose, then go through the setup step by step.
- how “Member Inviter” differs from “Admin Inviter”;
- how to prepare the group, users and accounts;
- what limits to set and how to read the log;
- why some people don't get added.
Which module to choose
- Member Inviter — working accounts invite people to the target group themselves. Use it if group members are allowed to invite.
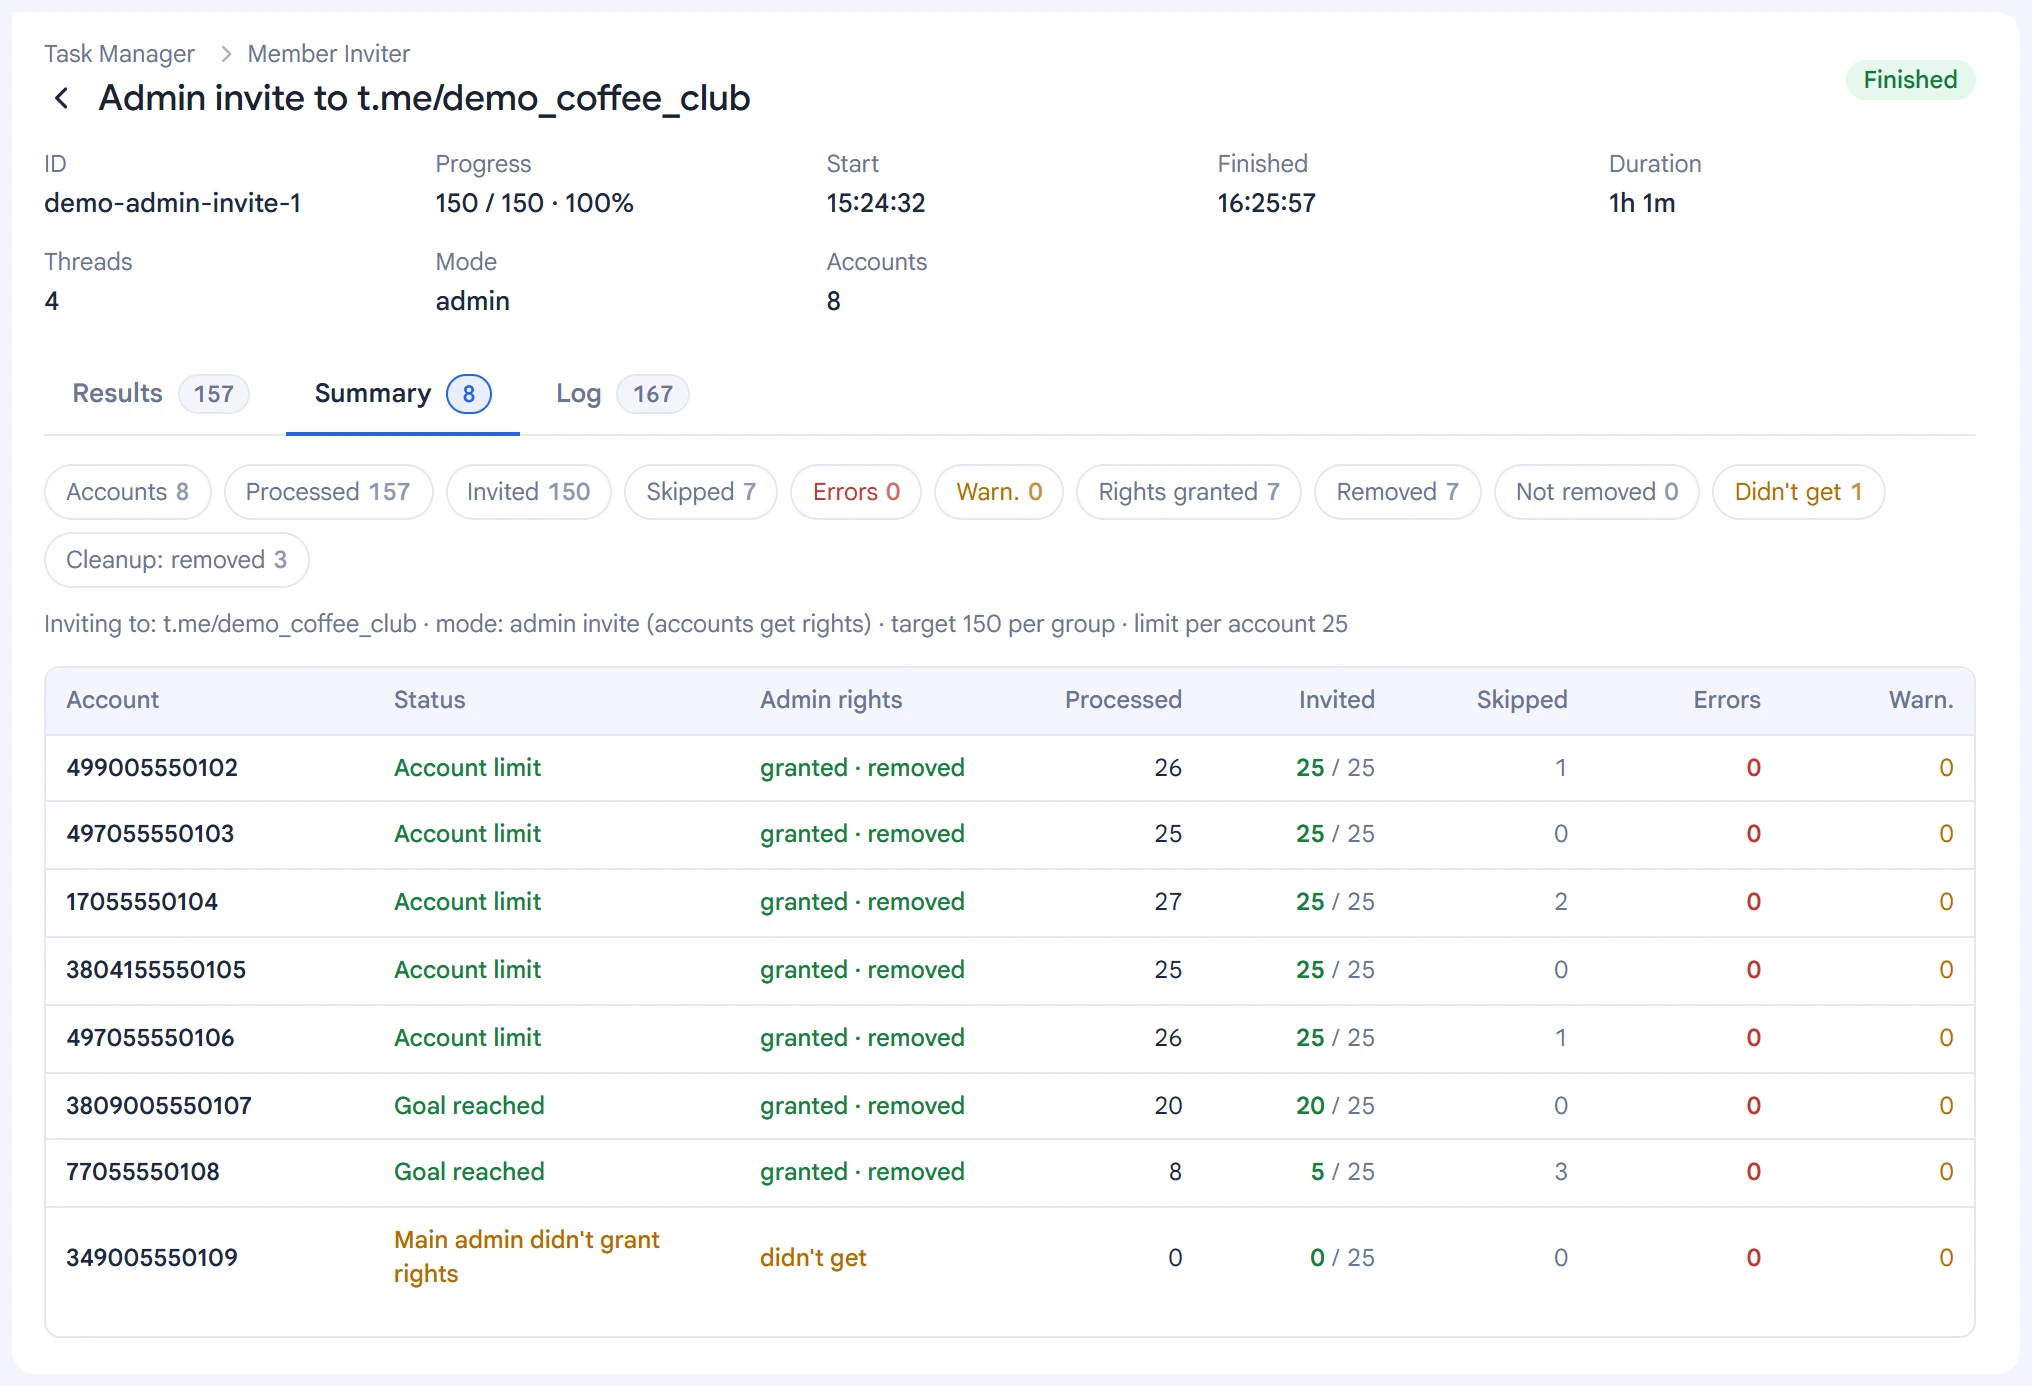
- Admin Inviter — for groups where only admins can invite. Your main admins grant rights to working accounts for the duration of the work and remove them afterwards. The person appears in the group as joined, not invited.
Setup is almost the same for both modules, so here we go through “Member Inviter” and cover what's specific to Admin Inviter at the end of the article.
Step 1. Target group
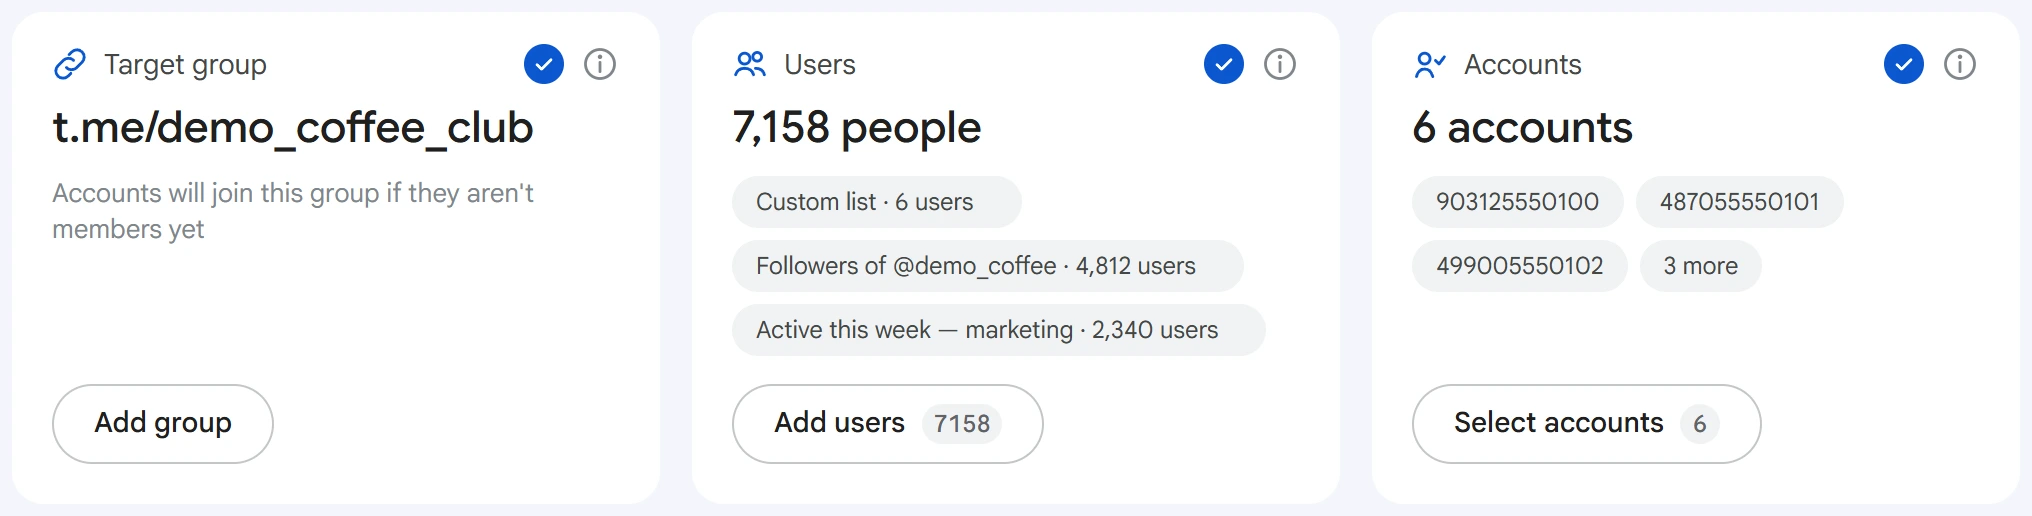
Click “Add group” and paste a link: t.me/group, @group or an invite t.me/+…. Select the group in the list and click “Save”.
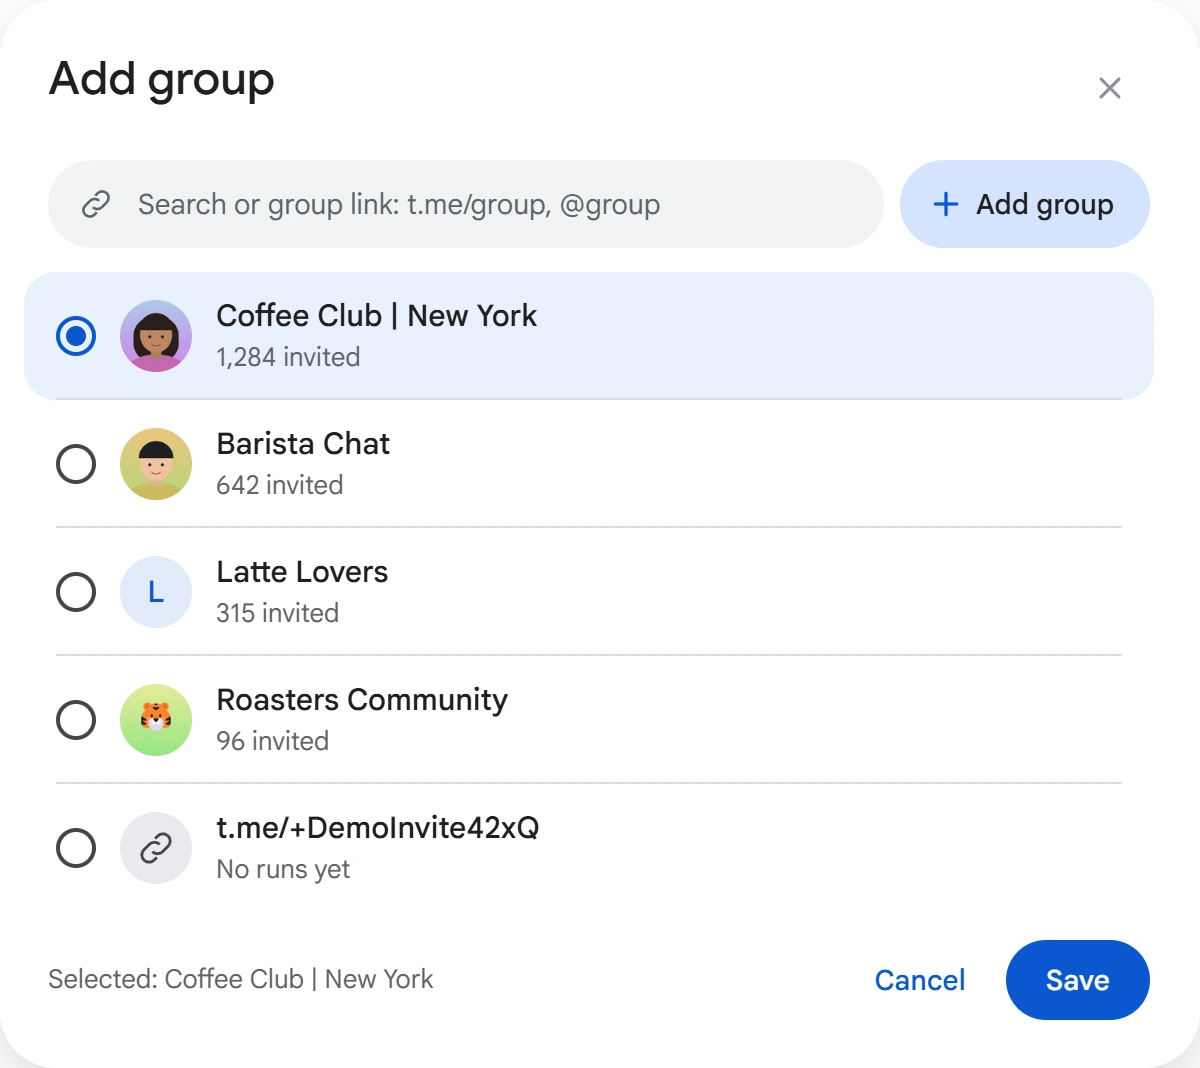
Groups are saved for future runs, and under the name you can see how many people have already been invited. If an account isn't in the group yet, the program will try to join it before starting work.
Step 2. Who to invite
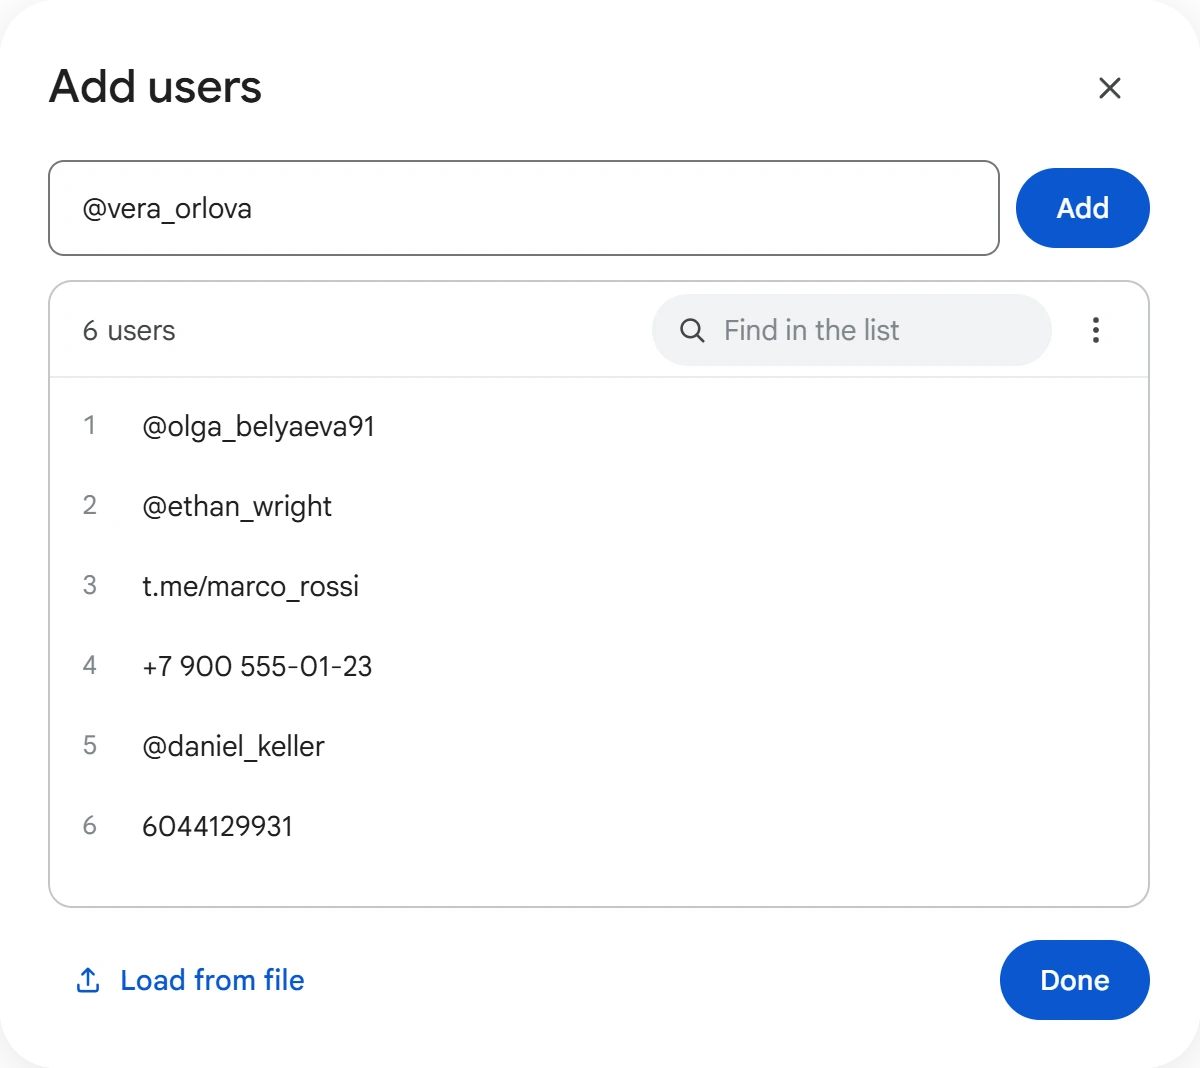
In the “Users” card, click “Add users”. Enter a @username, a profile link, a phone number or an ID, one per line. You can upload a list from a .txt or .csv file, and the program removes duplicates on its own.
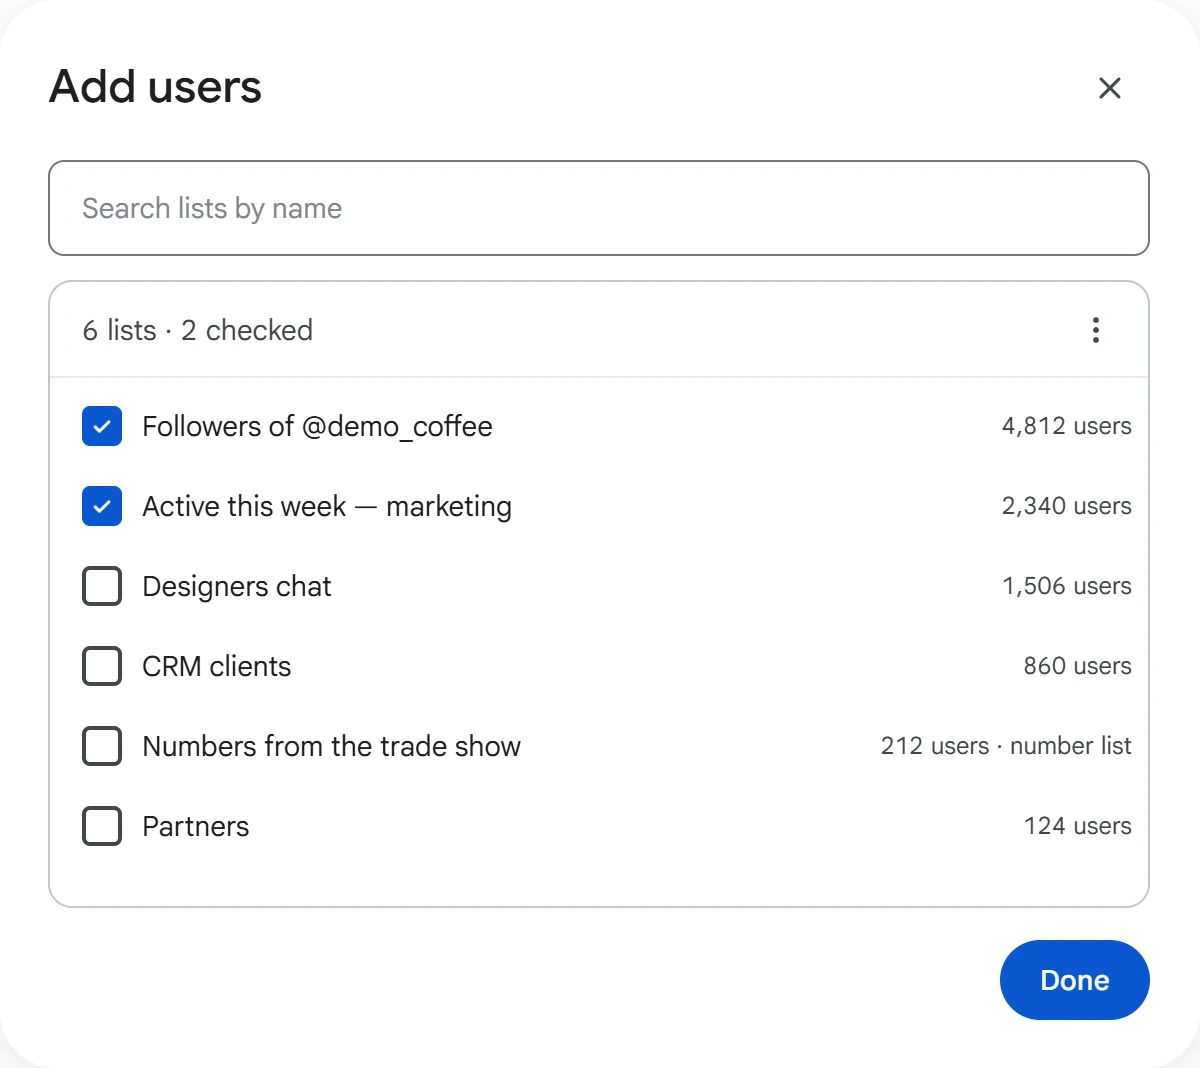
It's more convenient to take people from lists. In the “⋮” menu, choose “From a list” and check the ones you need, for example a competitor's channel subscribers collected by the “Audience Scraper” module. Number lists from “Number Checker” work too: from them, only numbers found in Telegram are used. You can combine a custom list with user and number lists.
Step 3. Accounts
Click “Select accounts” and check the working accounts. Before that, check their statuses and proxies: only active accounts with no spam block go into invites. Once the group, users and accounts are selected, all three cards show a check mark.
Step 4. Limits and delay
These are the task's main settings: they determine how long your accounts last.
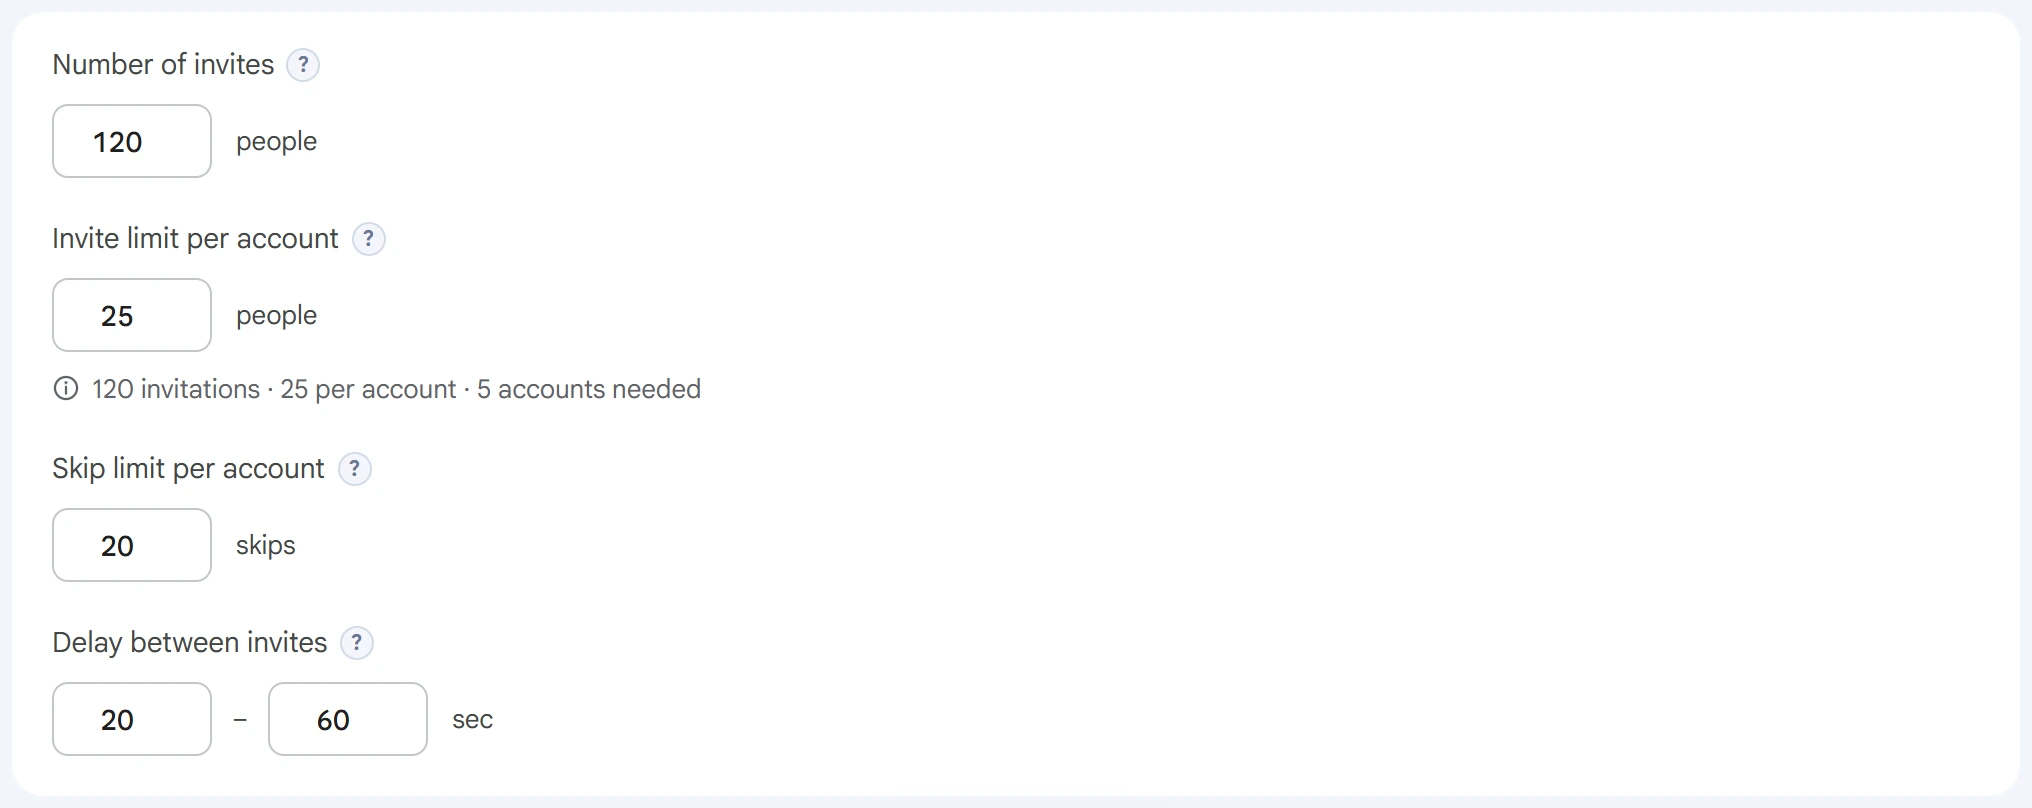
- Number of invites — the total limit for the task, across all accounts.
0— no limit. - Invite limit per account — once it reaches this limit, the account stops working in the task. The line under the field shows how many accounts you'll need.
- Skip limit per account — how many failed attempts an account can make before it stops.
- Delay between invites — a random pause in seconds, a new one from the range each time.
Inviting is a high-risk action: the account contacts strangers. So set a small limit per account and pauses of tens of seconds, with random variation, and get volume from the number of accounts. For more on the risks, see the Spam block and FloodWait article.
Step 5. Advanced settings
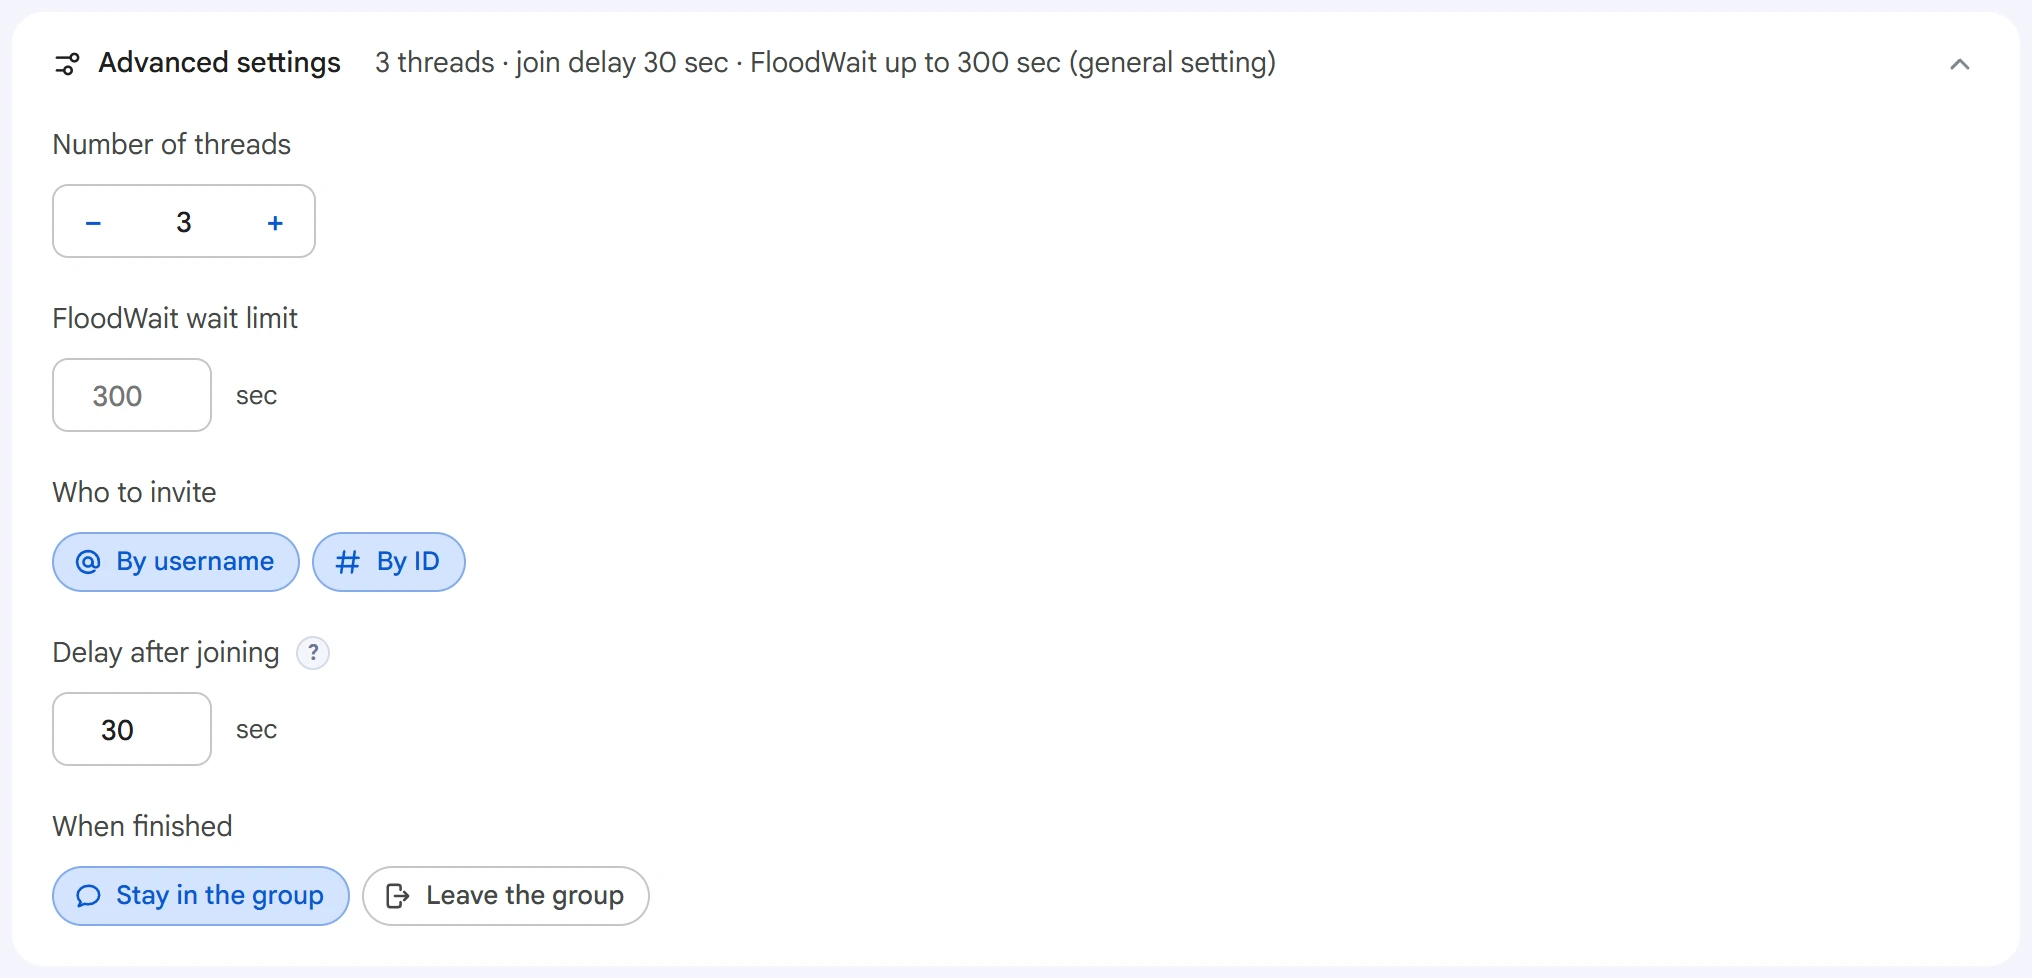
- Number of threads — how many accounts work at the same time.
0— the value from “Settings”. - FloodWait wait limit — how long an account is willing to wait if Telegram asks for a pause.
- Who to invite — by username, by ID, or both. Inviting by ID requires access to the group the user was scraped from.
- Delay after joining — a pause after an account joins the group, before the first invite.
- When finished — whether the account stays in the group or leaves it.
Step 6. Start and results
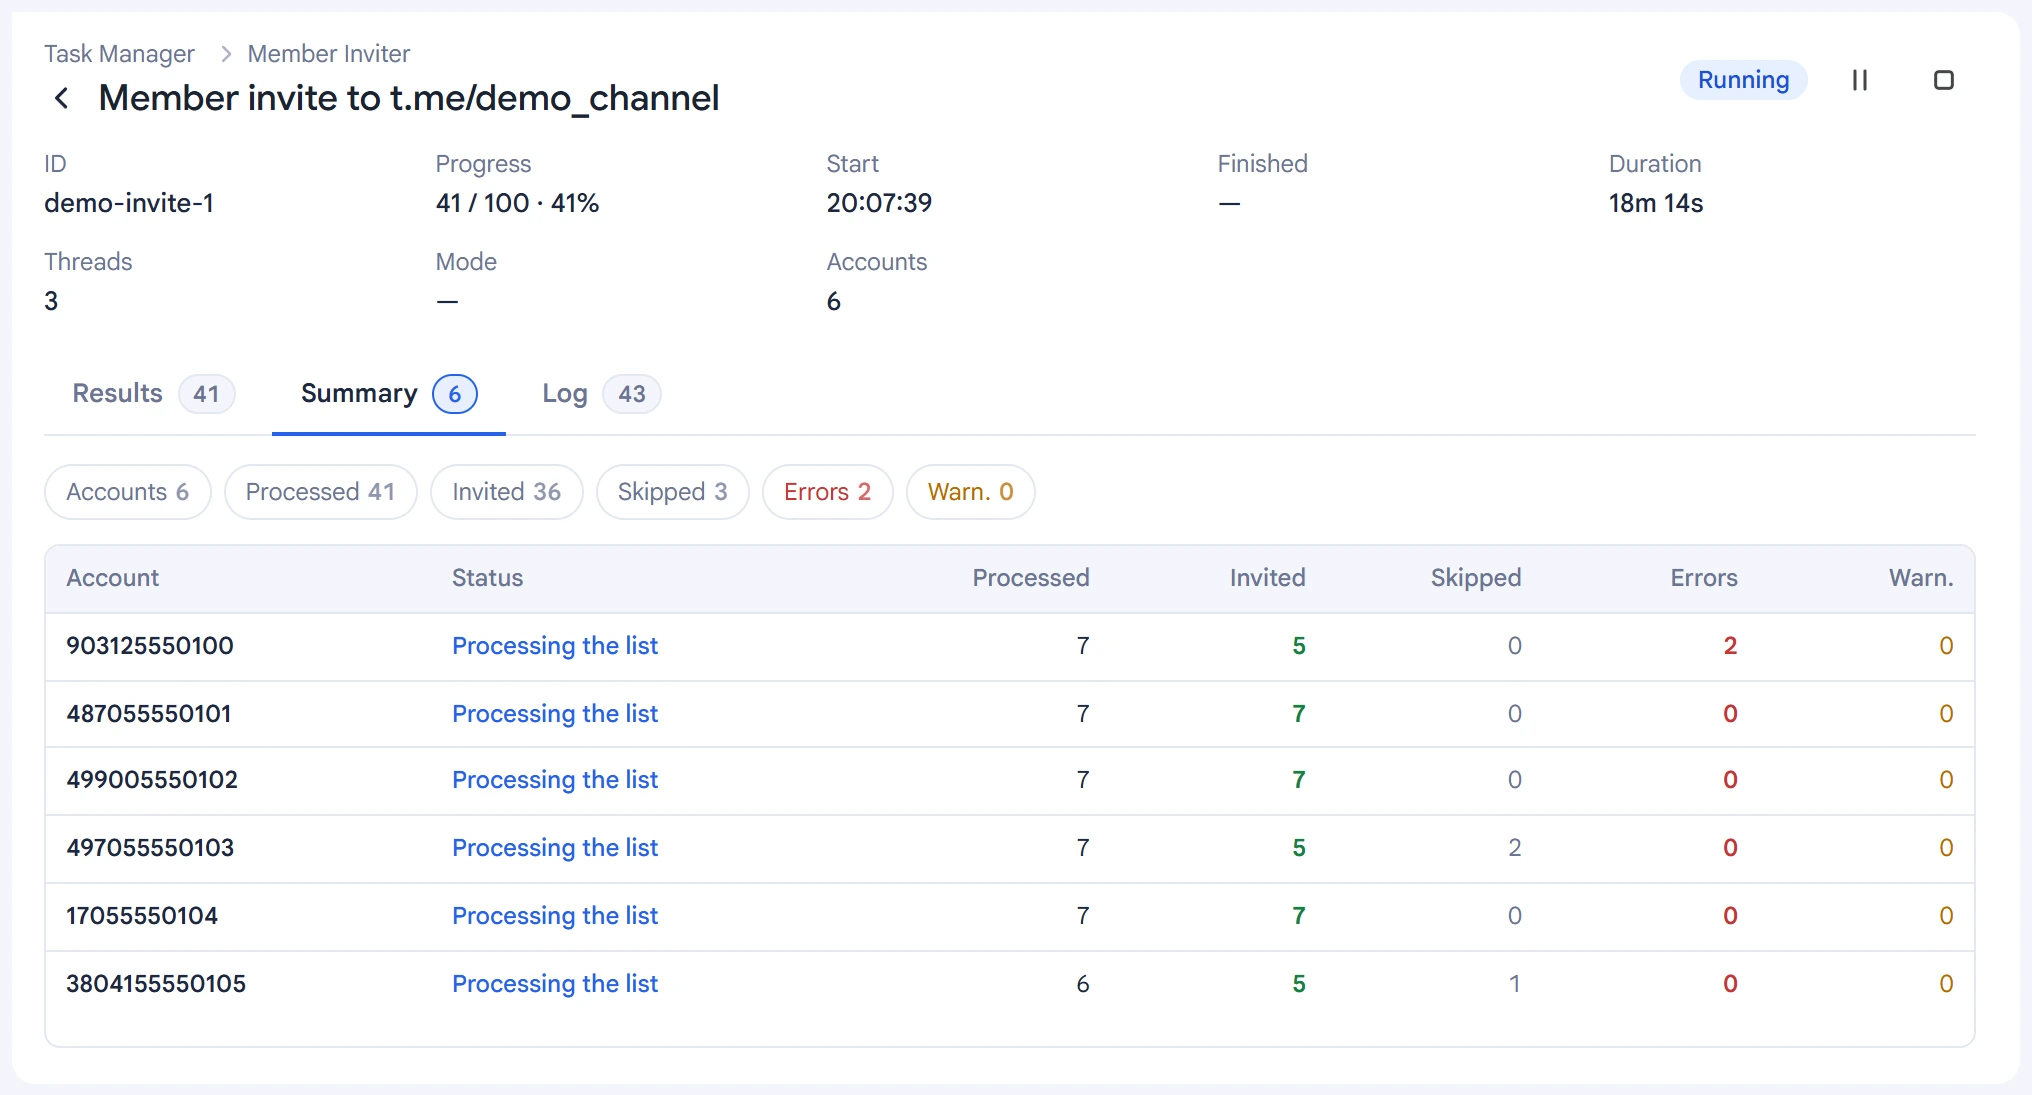
Click “Start task”, or use the calendar button to run on a schedule. Progress is shown in the Task Manager: the log shows each invite, skips with reasons and FloodWait waits.
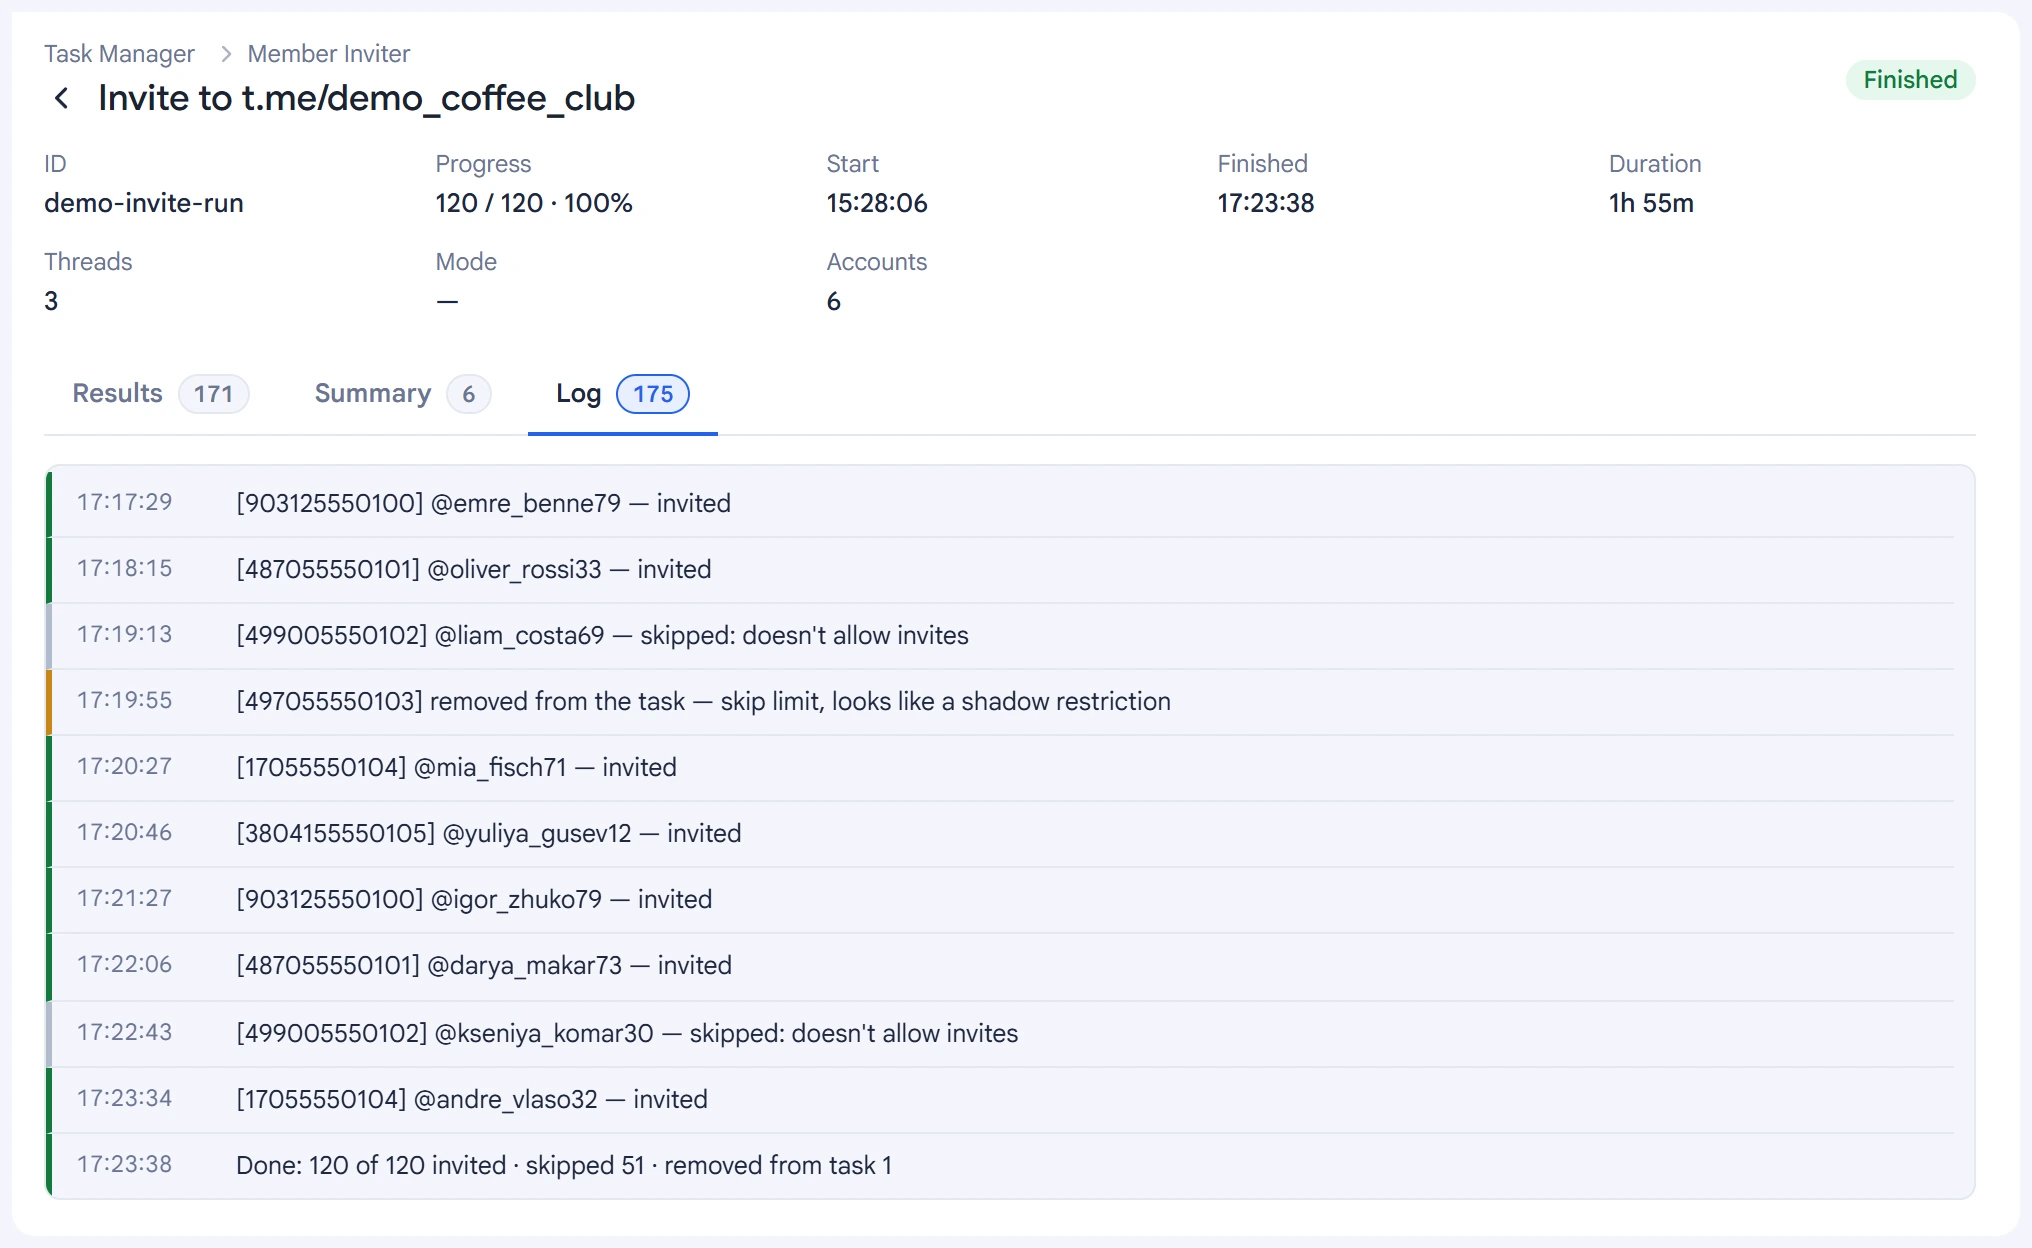
The “Summary” tab makes it easy to compare accounts: how many each one processed, invited and skipped. If one account has noticeably more errors than the others, check its proxy and status.
Why some people don't get added
- Privacy — the person's settings don't allow adding them to groups. These users get the “Invite: privacy” status in the list and are skipped in future tasks.
- Already in the group — the person is already a member of the target group.
- Users already invited to this group aren't processed again.
The number of invited users may differ from the member count: people leave the group, and some may have been in it before the run. You can resume a stopped task from the Task Manager, from where it left off.
Admin Inviter specifics
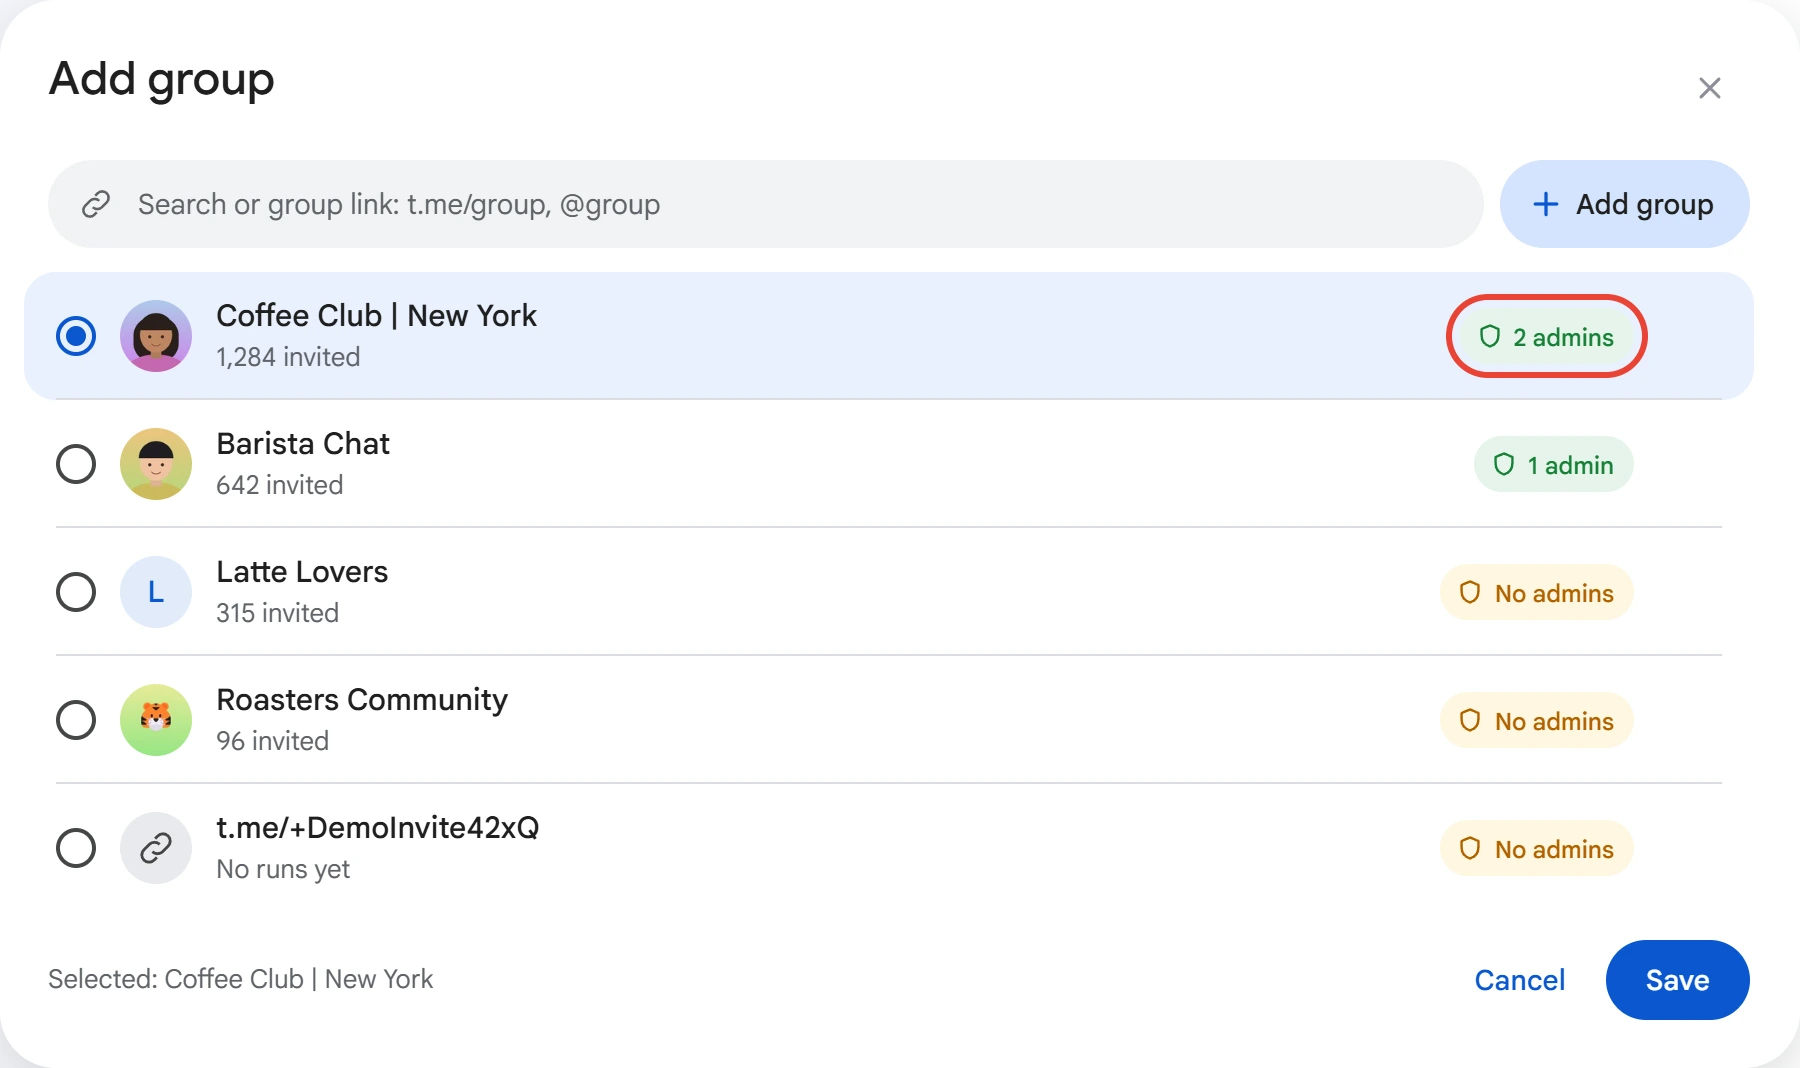
In this module, each group has main admins: your accounts that are already admins of the group with the “Add New Admins” right. You can select them with the button to the right of the group name.
- In Telegram, the “Add New Admins” right is off by default. Turn it on for main admins manually.
- Appoint two or three main admins: Telegram requires a pause between grants of rights, so several admins work faster. If one of them gets a restriction, the others carry on.
- Main admins don't invite: you need at least one working account besides them.
- Leave free admin slots in the group: there can be no more than 50 admins, and worker accounts also take up slots during the work.
- If the group accepts members only by join request, a working account won't be able to join.
Rights are removed by the same main admin that granted them. The “Summary” tab shows who had rights granted and removed. If a task was stopped mid-work, the program removes the remaining rights at the next start, or right away with the “Check admins” button.